File Handling
Within a Coscine resource, you can upload, describe with metadata, download, and delete research data.
Upload files
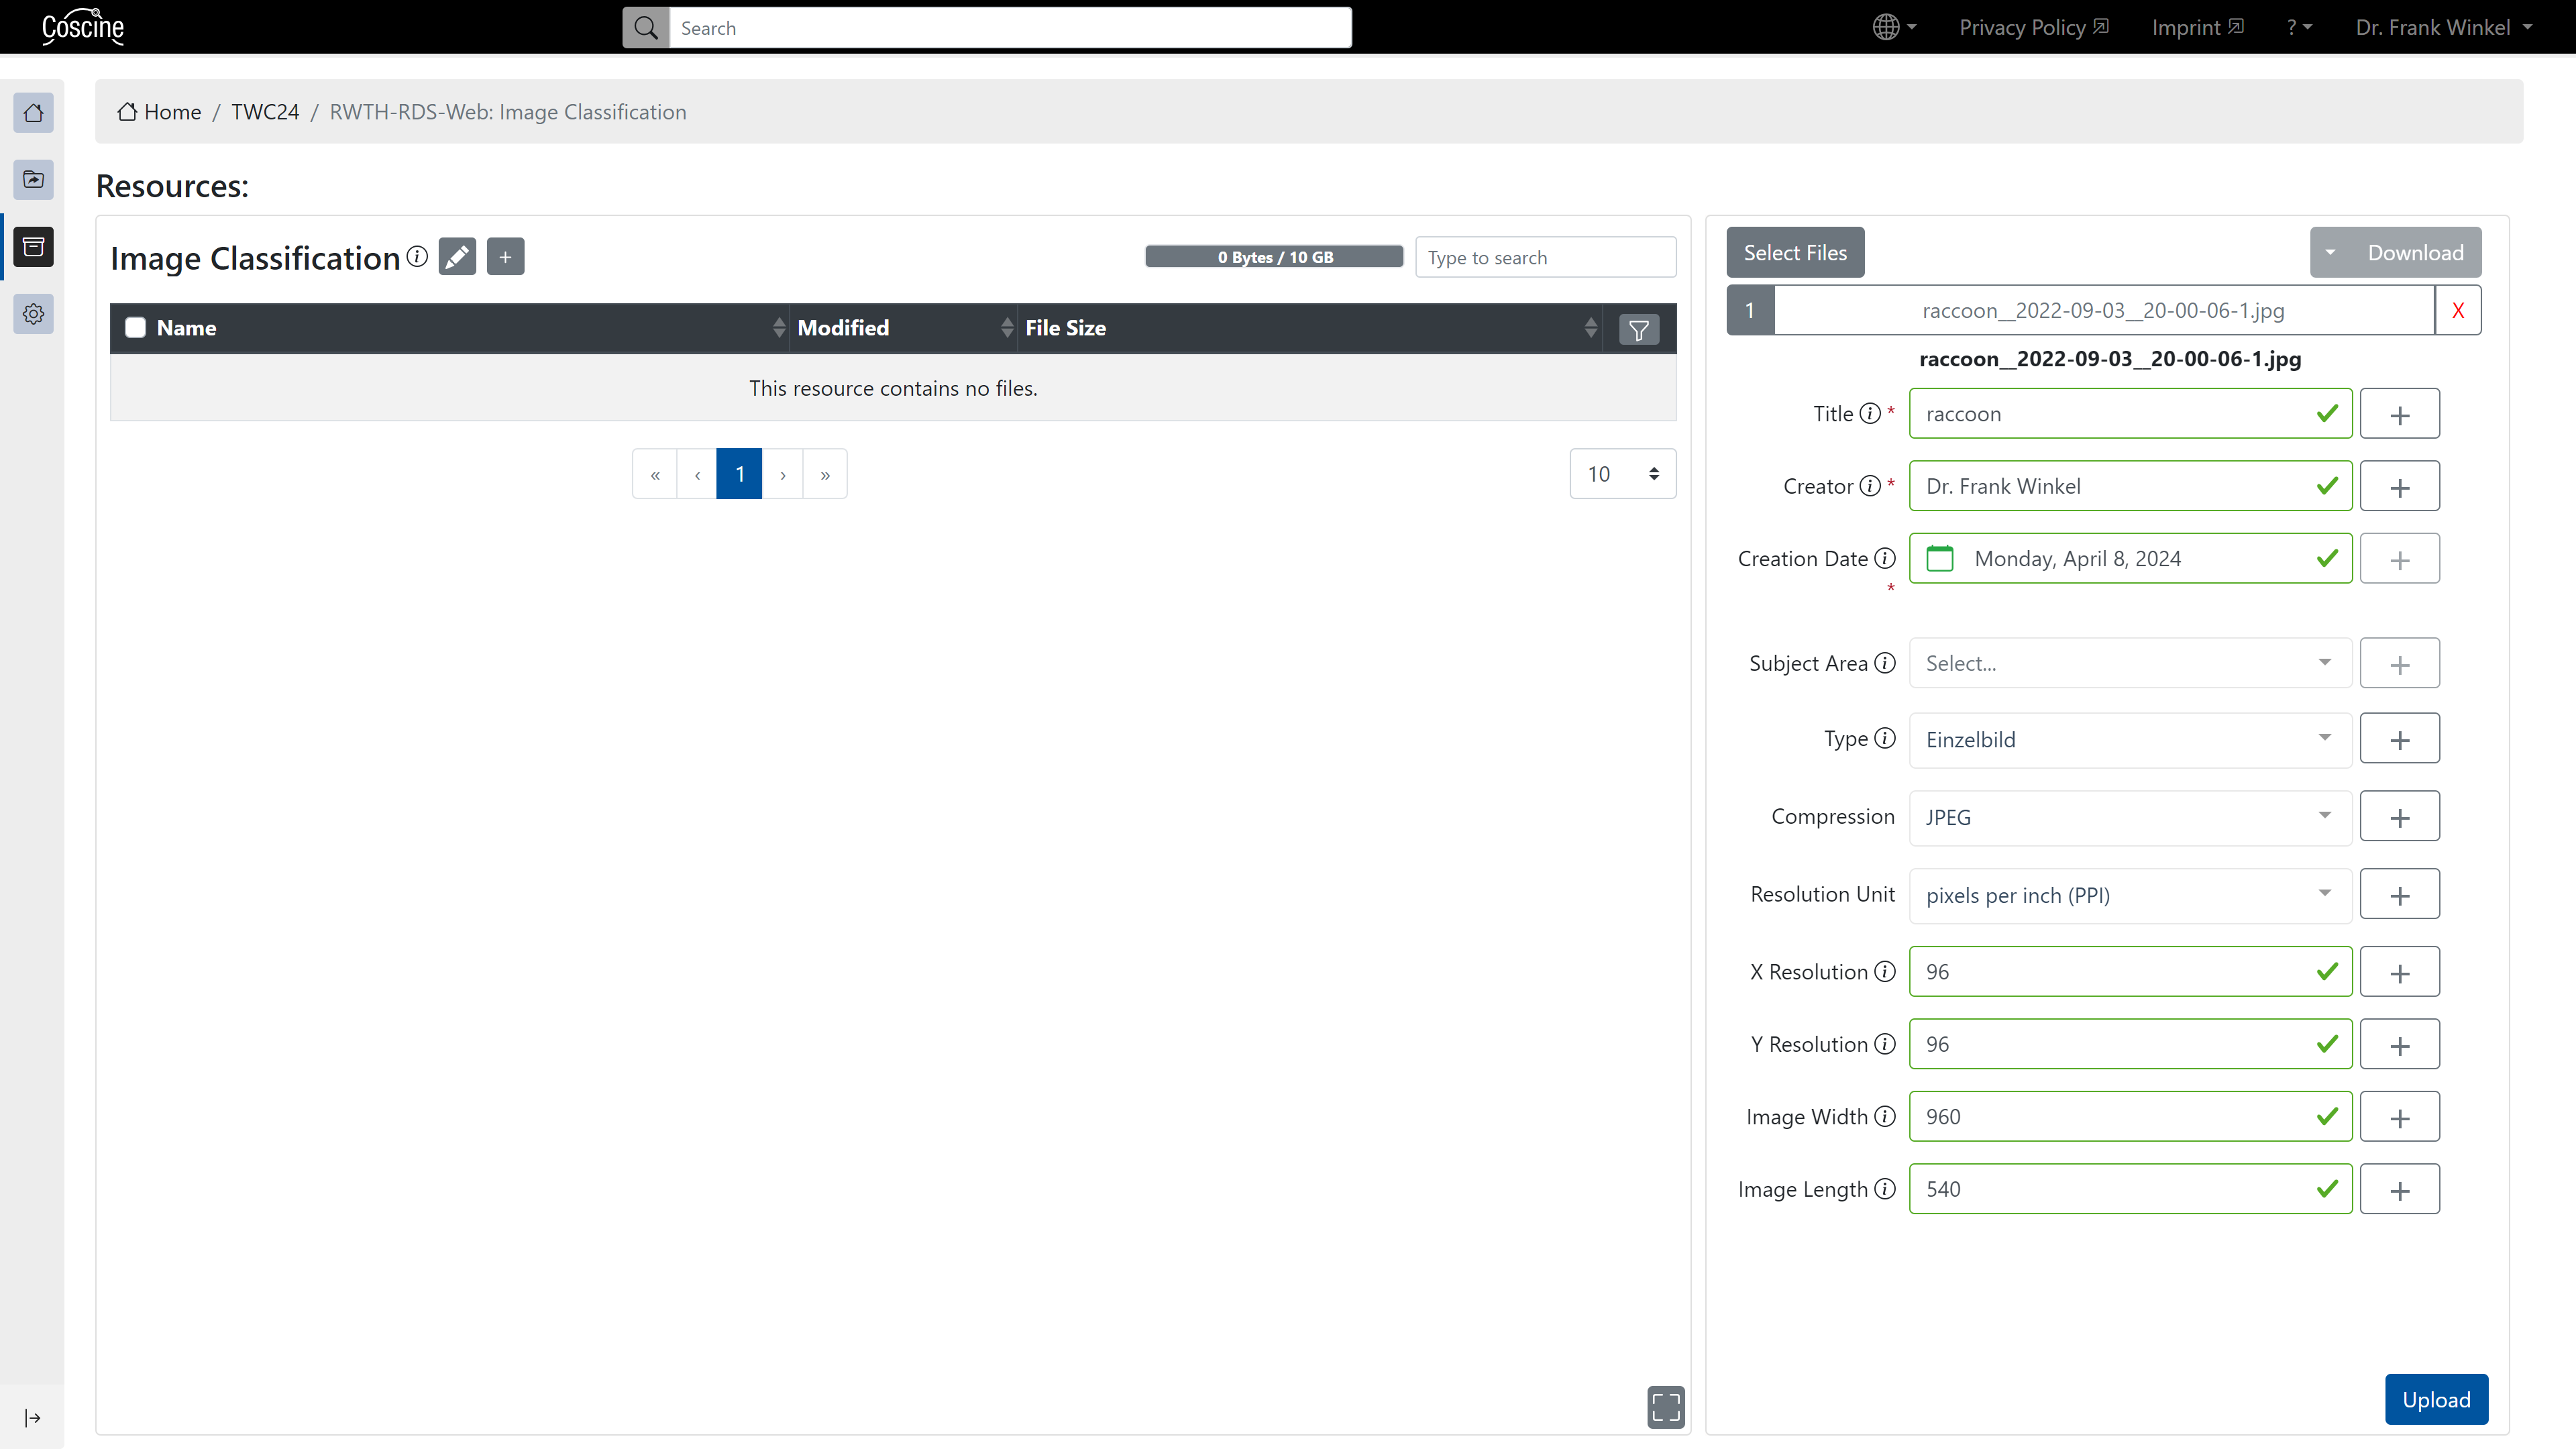
Uploading files is done in four steps (see Figure 1):
- Click on the plus next to the resource name.
- Select one or multiple files.
- Specify metadata in the file context menu for each individual file or once via "All Files" (fields with an asterisk (*) are mandatory).
- Click on "Upload" in the file context menu.
Info
If the upload of a file fails, this may be due to the file name if it contains special characters that are not suitable (e.g. a vertical bar). However, most special characters can be used without any problems.
Files are now visible in the table with name, upload date ("modified") and file size. The metadata schema was selected when creating the resource. The metadata entered here can be changed later in the file context menu. The metadata schema cannot be changed within a resource (for more on this topic, see Metadata and Metadata Profiles).
Multiple Selection
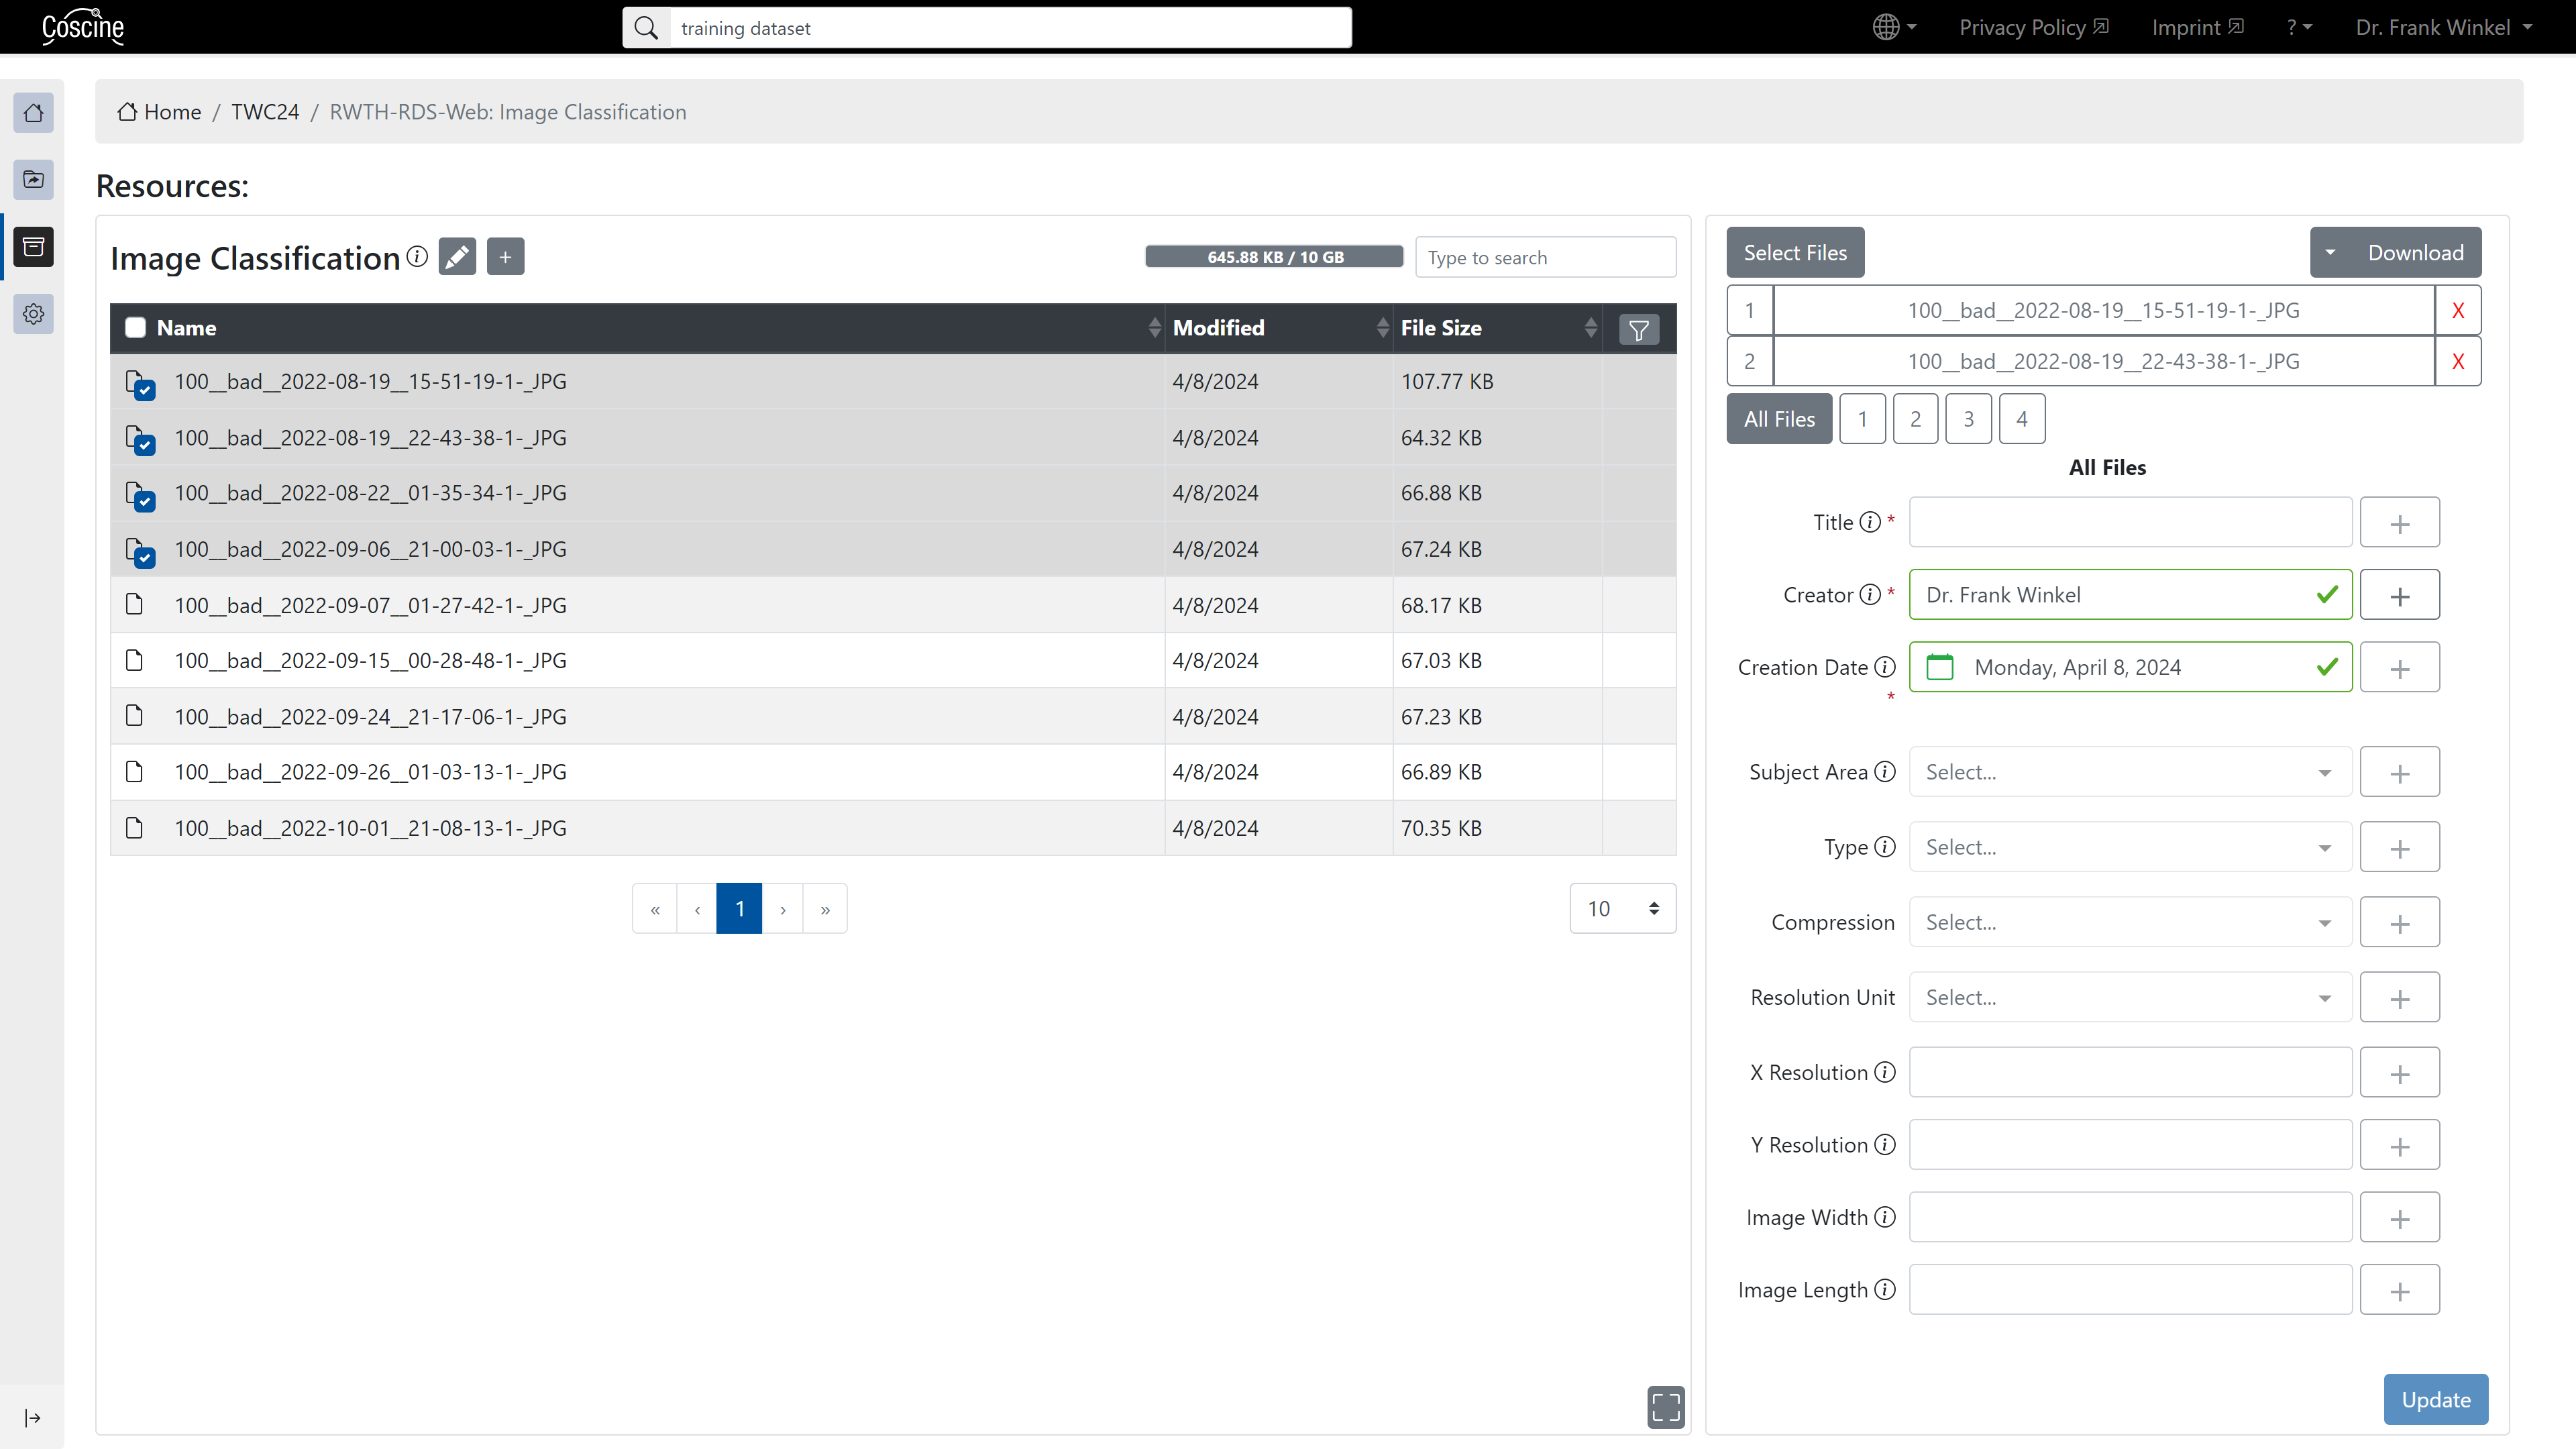
You can select multiple files simultaneously in the File Explorer (middle panel) and work on a subset of the selected files in the file context menu (see Figure 2).
Info
for simultaneous editing, the "ALL FILES" area must now be selected in the file context menu.
Example
(Figure 2): files cat.jpg and cat2.jpg are selected simultaneously in File Explorer (left). In the file context menu (right) only the first file (file index 1) is selected for editing.
Upload folder
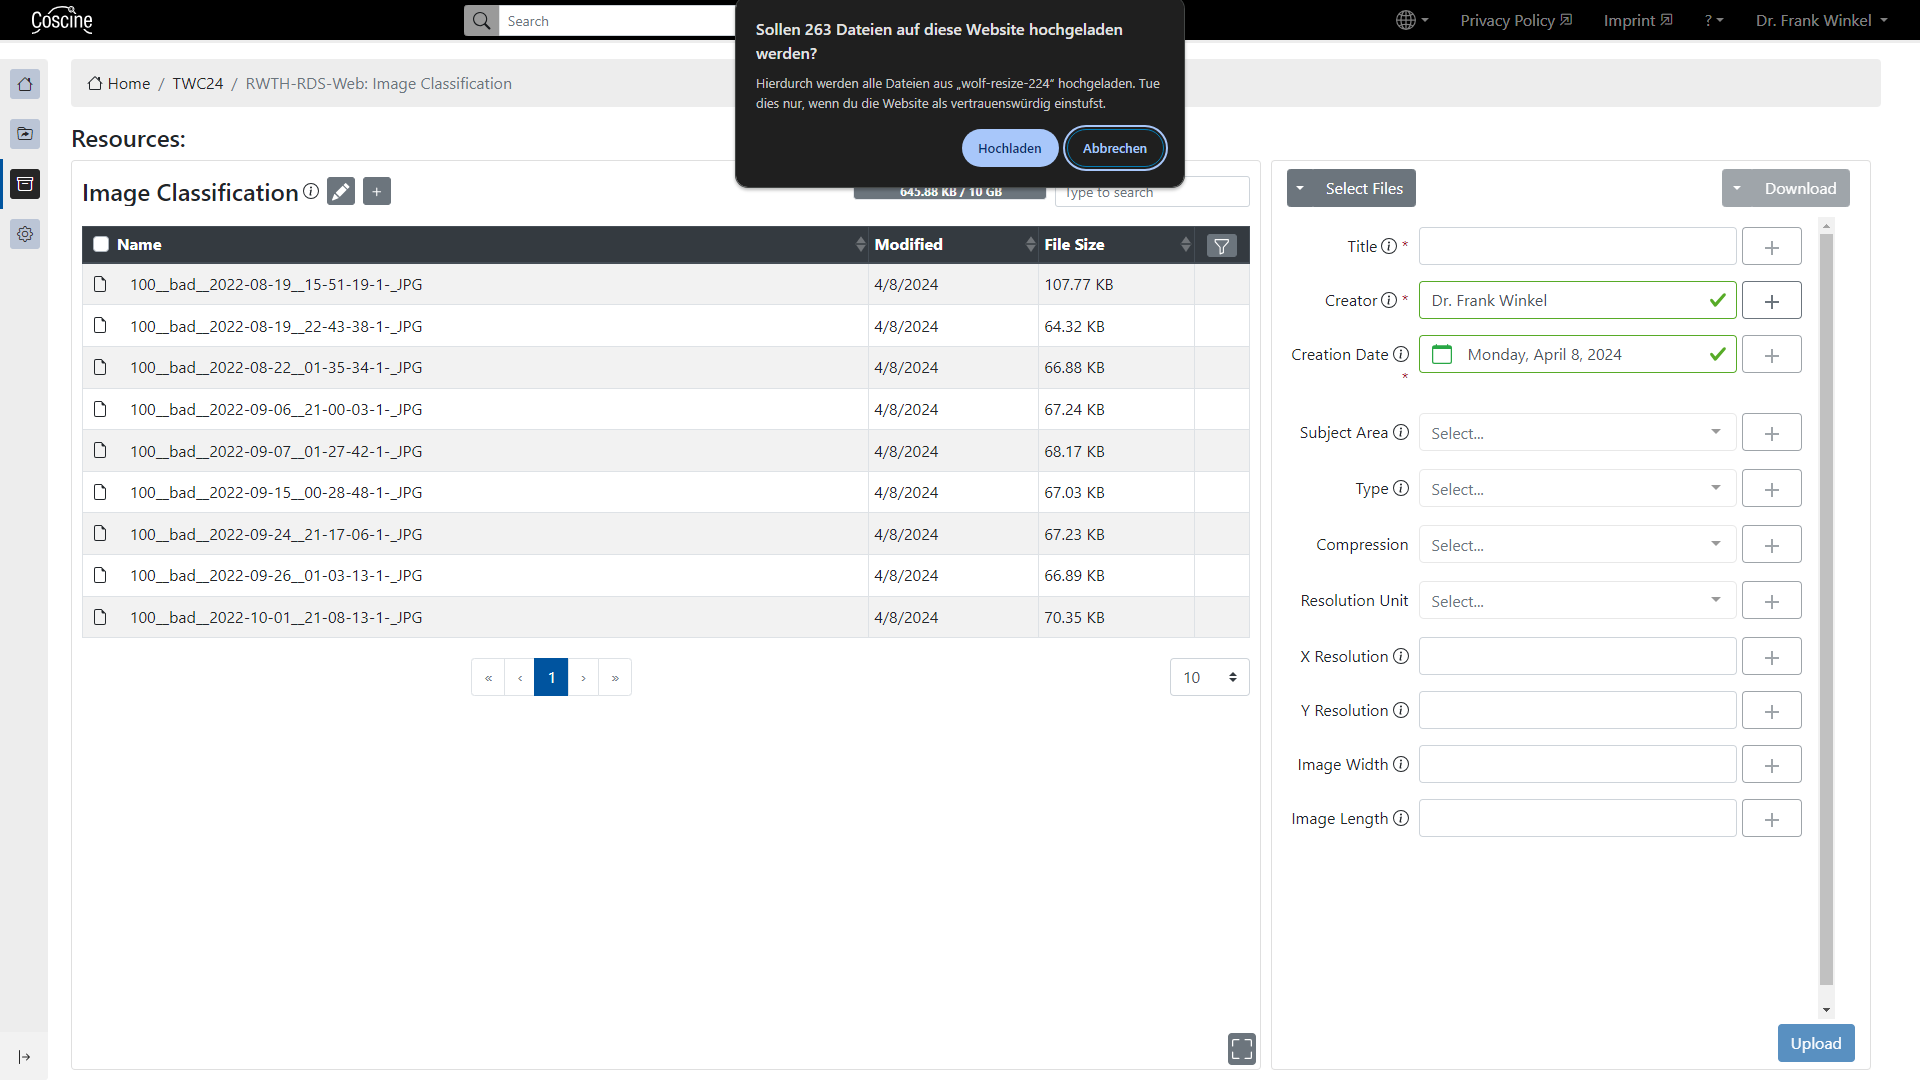
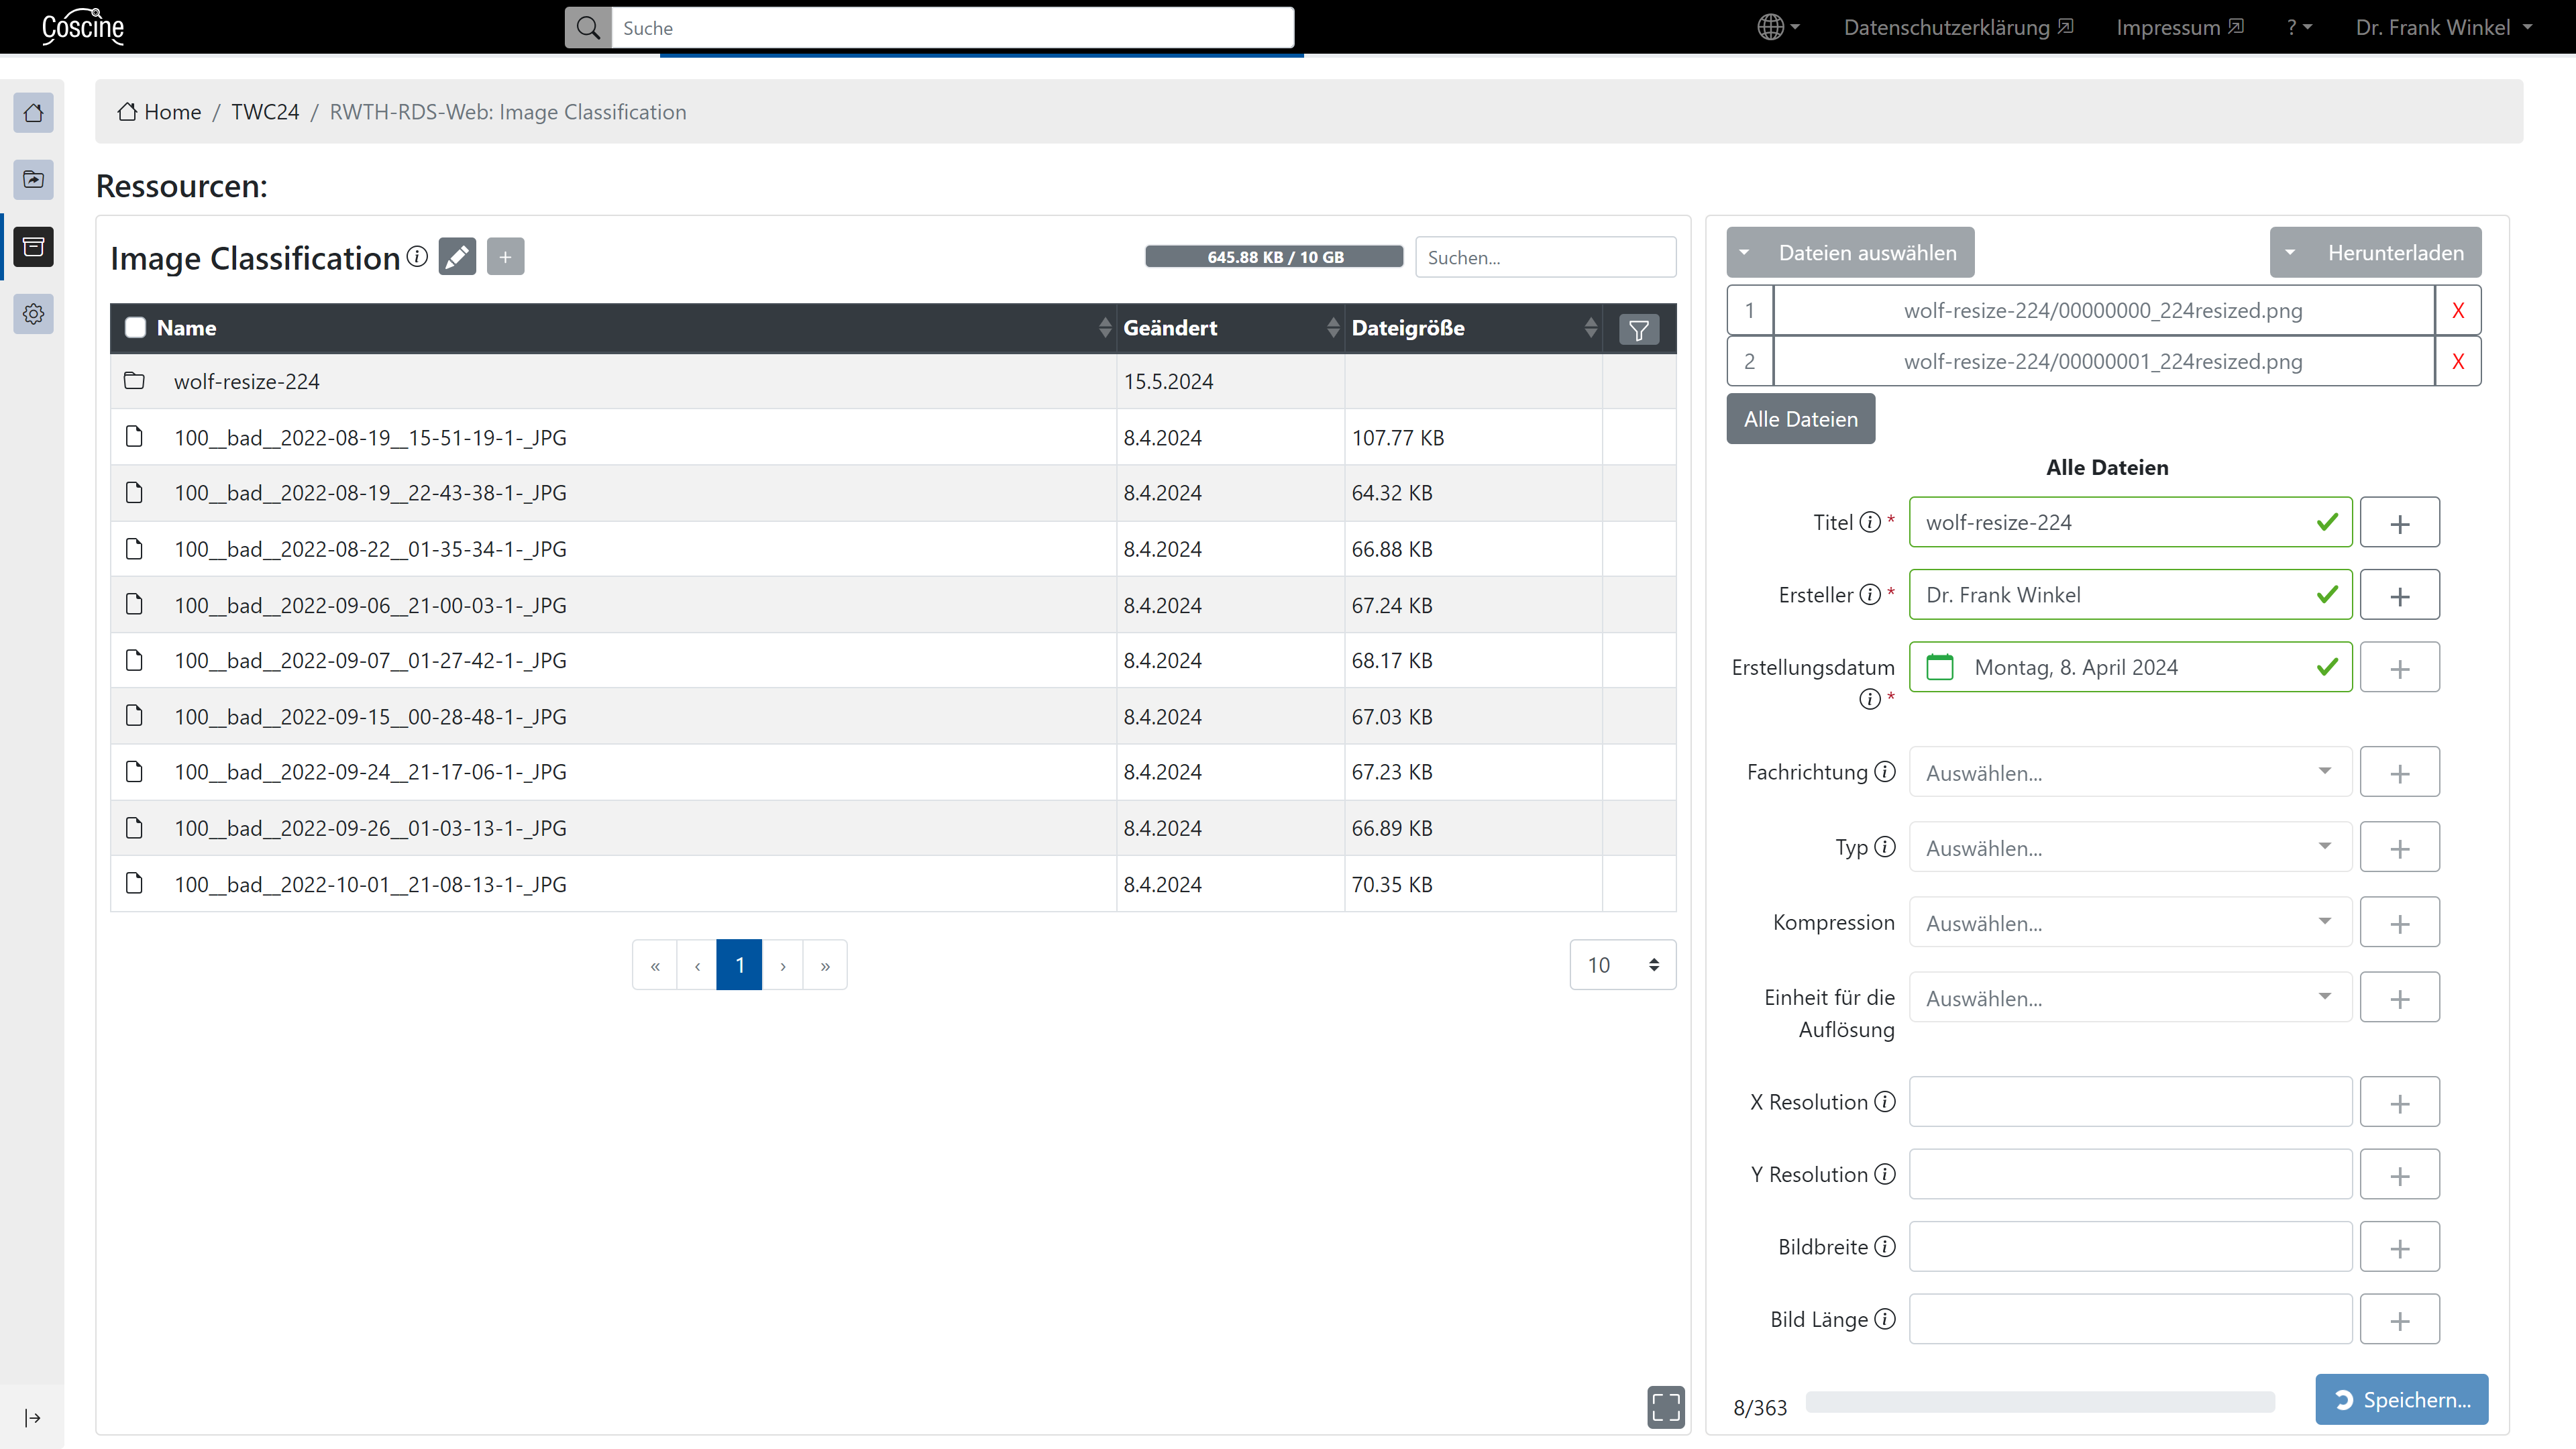
You can upload not only individual files but also entire folders to Coscine. To do this, either use the "Select folder" drop-down button on the right-hand side or drag and drop the folder there. Depending on the browser, you will be asked to confirm your action again (Figure 3).
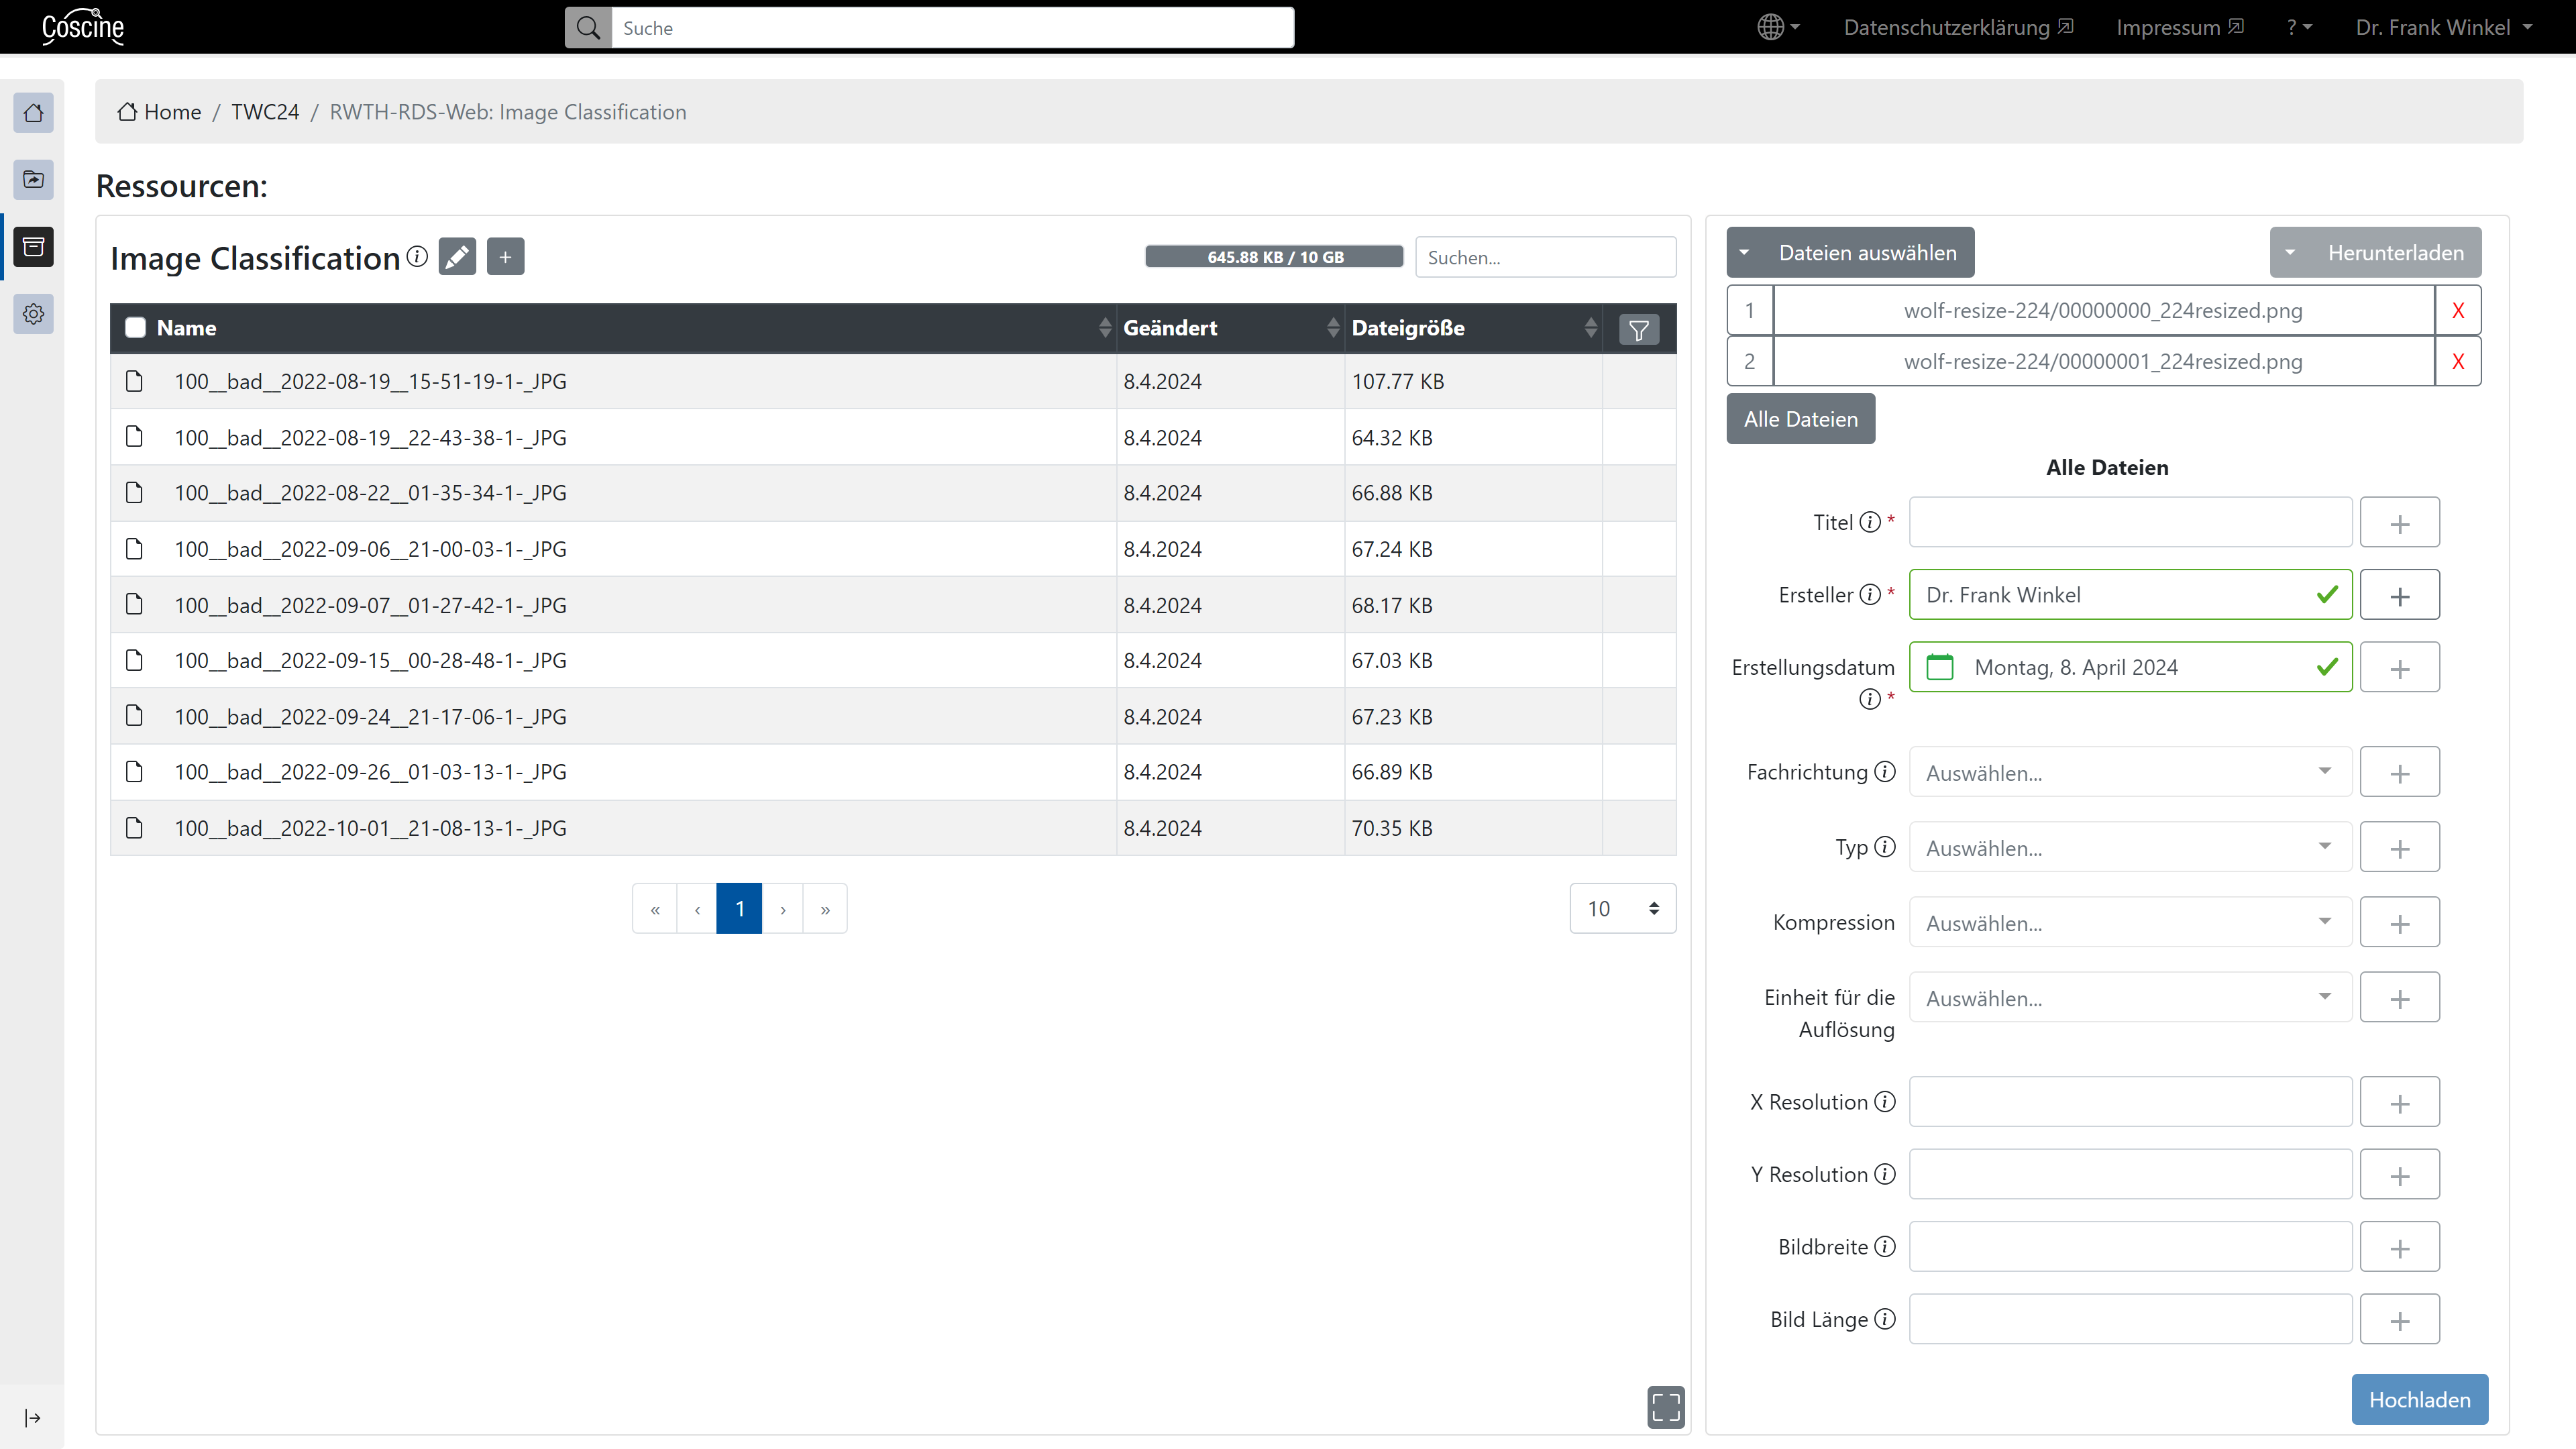
The files contained in the folder are listed (Figure 4) and you can now enter the corresponding metadata for each file individually. If you want to use the same metadata for each file, this is also possible: To do this, click on "All files" and add the corresponding metadata. Once the folder has been successfully uploaded, the metadata is displayed when you select the individual files. Individual uploaded files can be selected by scrolling through the list and clicking on the white box that then appears.
Note
If you subsequently change the metadata of an individual file, the metadata of the other files contained in the folder will not be automatically adjusted!
Downloading files
Downloading files is done in two steps:
- Select one or more files in the file explorer
- Click on the "Download" button in the file context menu (Figure 3).
Deleting files
Deleting files is done in three steps (see figure 4):
- Select one or more files in the file explorer.
- In the file context menu click on the drop-down arrow next to the "Download" button
- Select "Delete" option
Info
If you delete a resource, the files it contains are not automatically deleted. Therefore, used storage space is not released again after deleting a resource. You should therefore either delete all files individually or use an S3 client for an S3 resource. An example of deleting folders via Python can be found in the Coscine Community Features.
Sharing files
In storage space resources, files can also be shared publicly outside Coscine for 24 hours via a link. Only owners and members within a project can use this function.
Sharing files is a two-step process:
- Select a file in the file explorer (only one file possible at a time)
- Click on the “Share” button in the file context menu
By clicking on “Share”, the link is copied to the clipboard and is then valid for 24 hours. If the link is entered in the search bar on the Internet, the download will start immediately and you will then find the downloaded file under your downloads.
