Edit/Configure Resource
Project owners can adjust the resources as often as they like. In the edit menu for each resource, there are three tabs available:
- Resource metadata: Customise metadata
- Metadata profile: customise and download the selected profile
- Actions: Read-Only Mode, local metadata copy, deletion
Opening the Resource Configuration Menu
There are two ways to open the resource configuration menu:
- On the project homepage: Hover your mouse over a resource. Click on the pencil icon that appears.
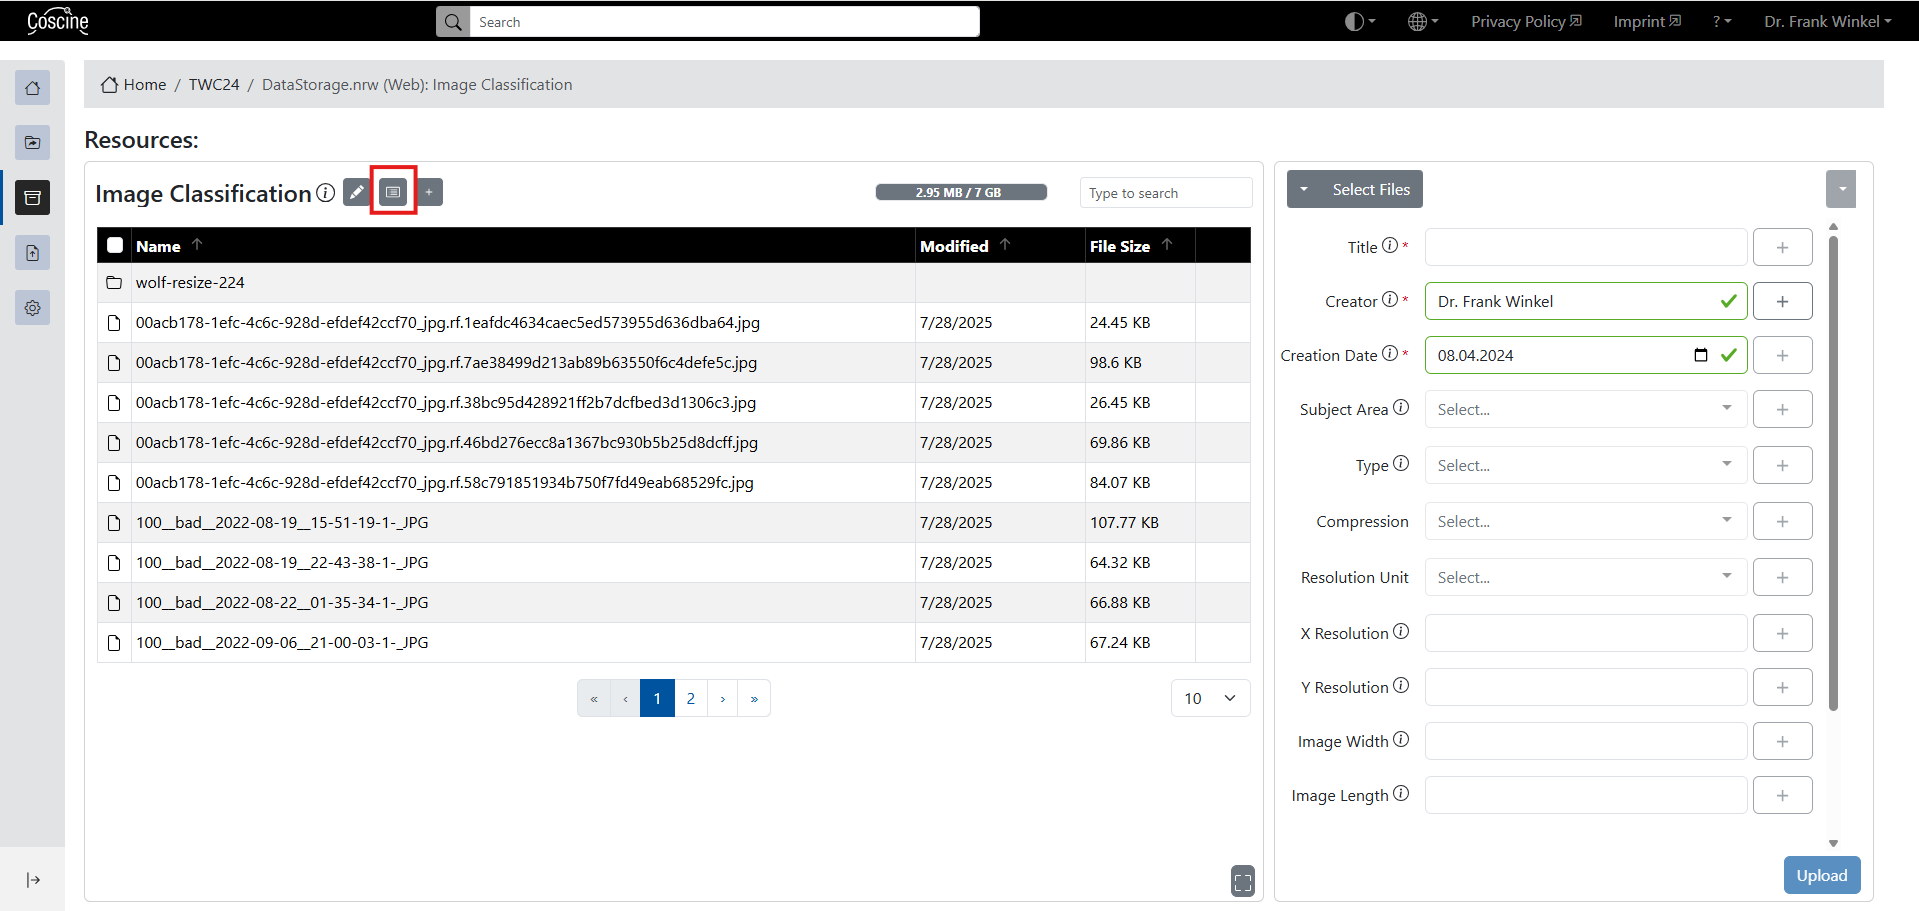
- In the resources view: Click the pencil icon next to the resource name (see Figure 1).
At the top of the edit menu, you will find the most important metadata for your resource. This includes the project and resource name, the Resource Type and the Persistent Identifier. Under Quota, you can also see the storage space still available for the resource in relation to the space already in use. Clicking the cog icon at the bottom of the screen takes you directly to the project’s Quota Management Tool.
Under important metadata, there are three tabs where you can edit the resource.
Resource metadata
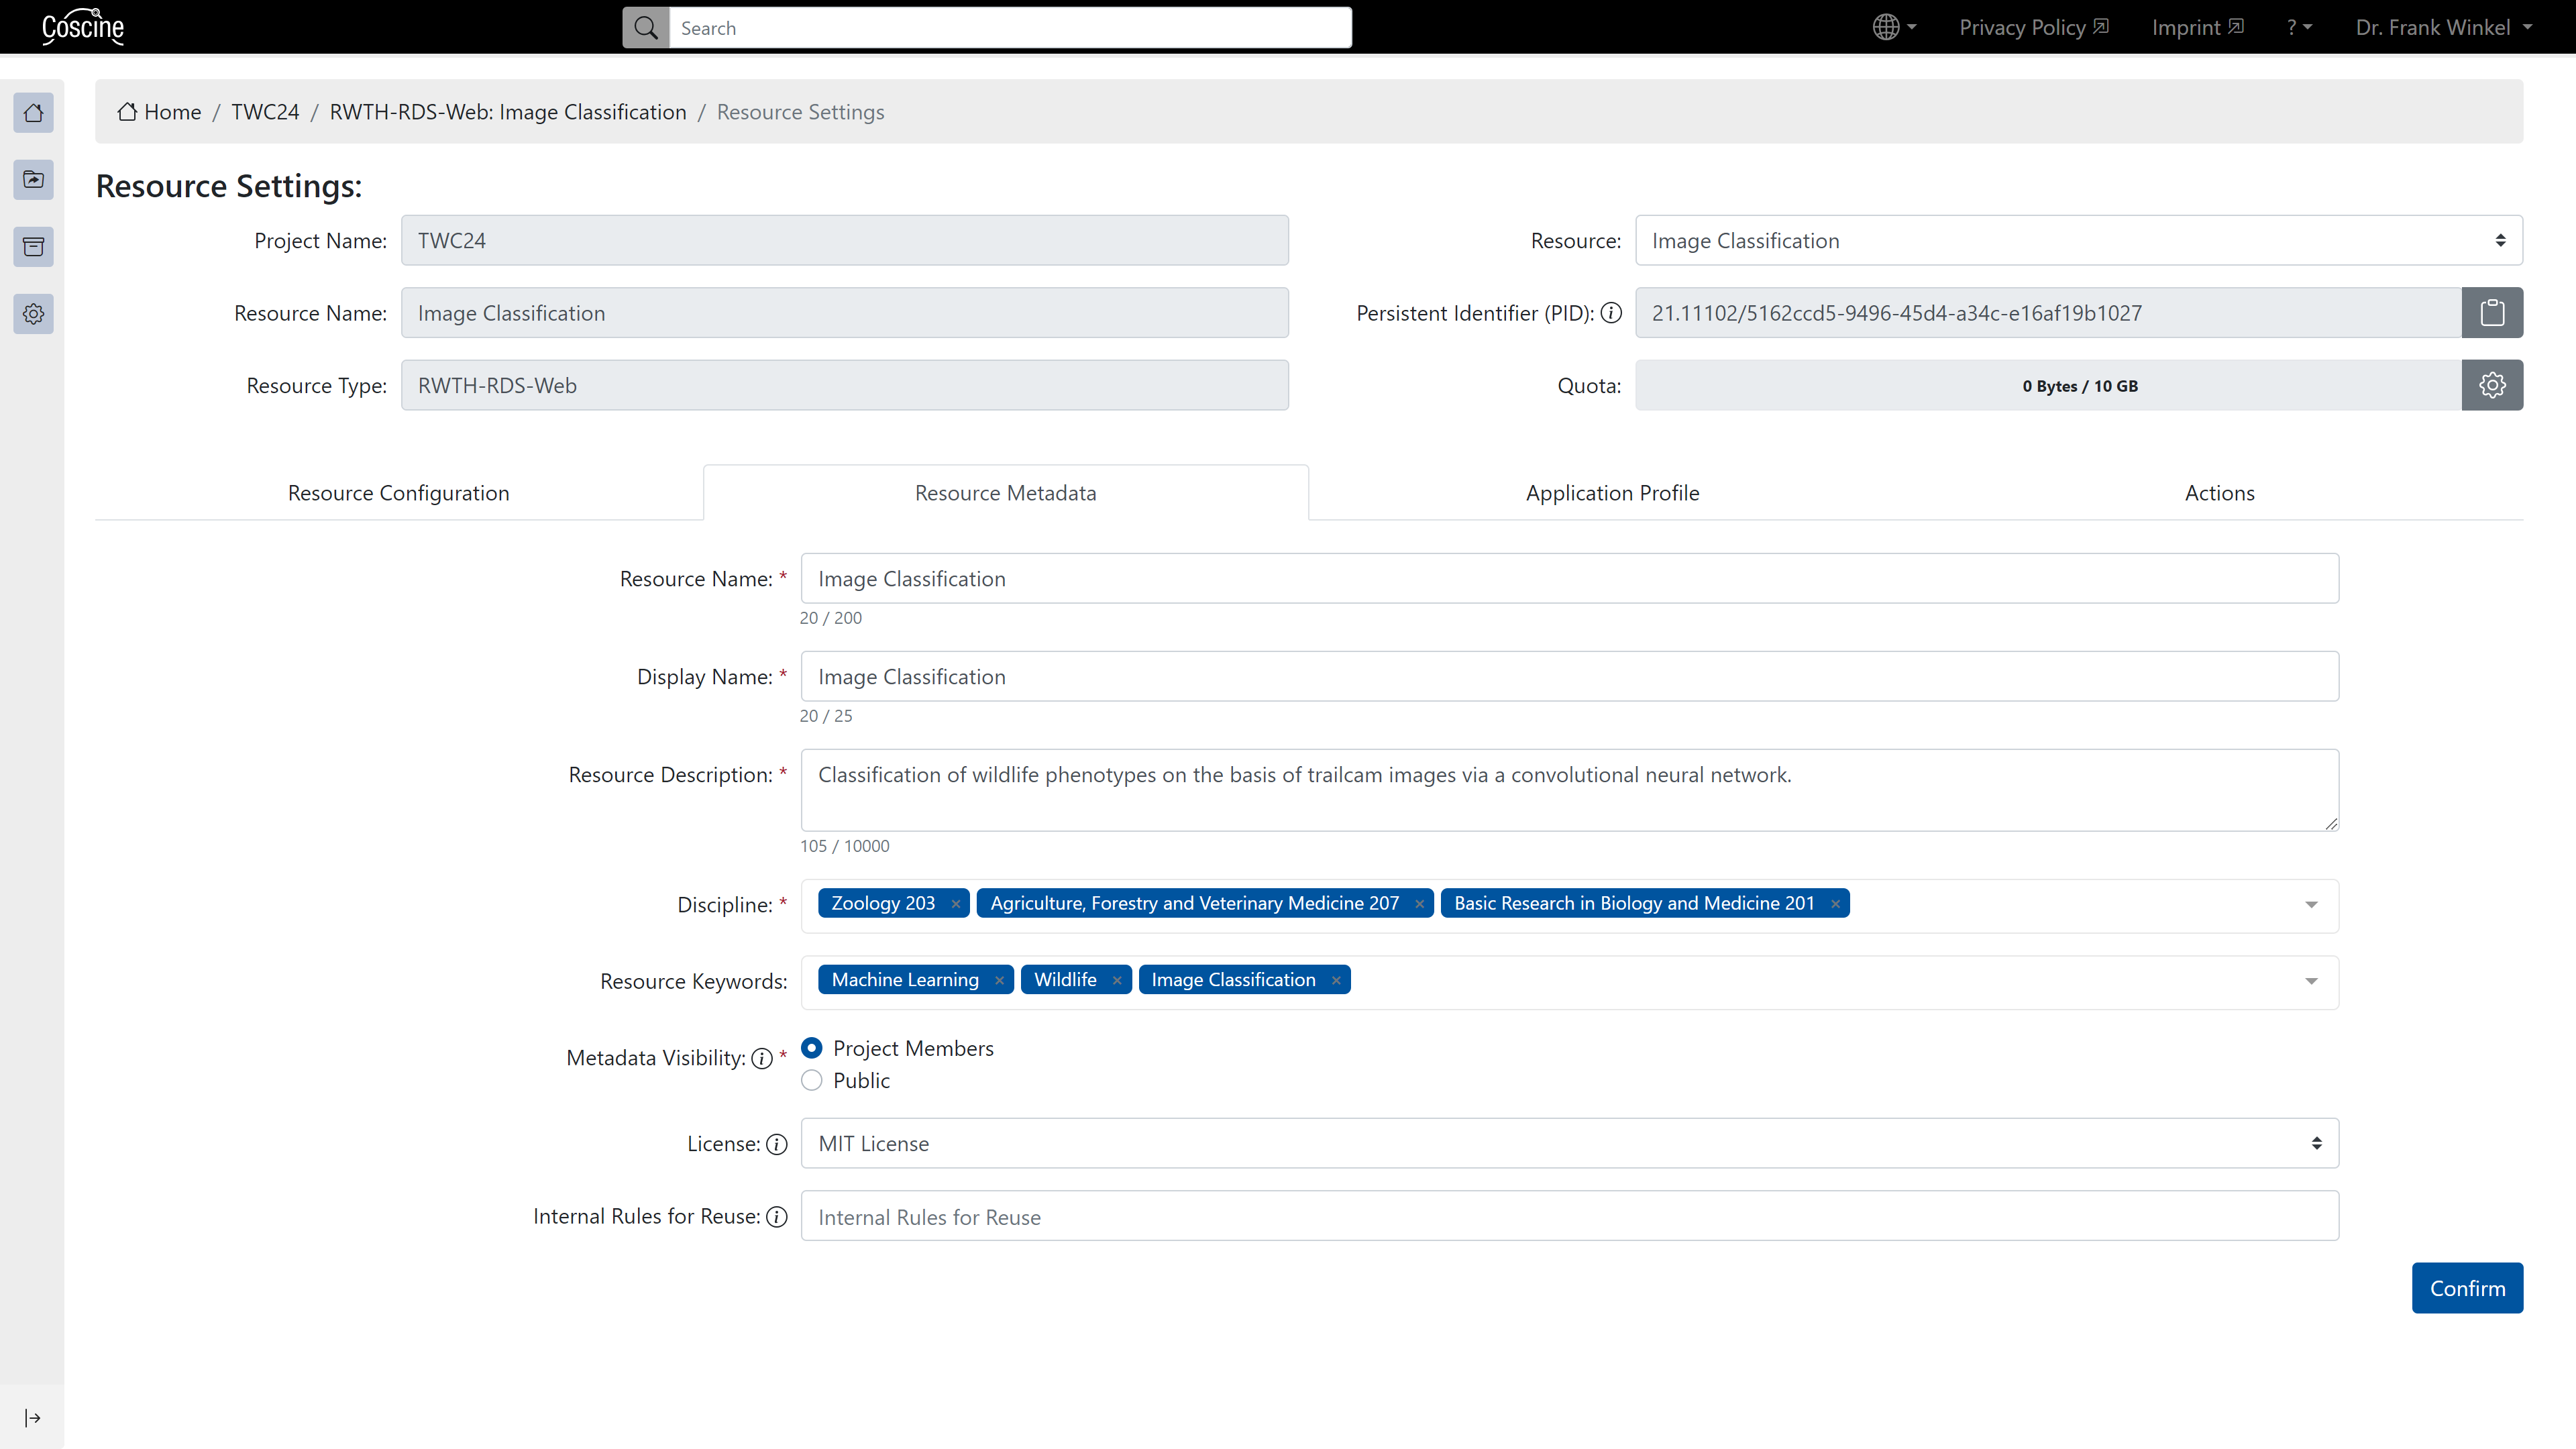
In this tab, you will find an overview of all the most recently entered resource metadata (see Figure 2) and can edit it if required.
Metadata profile
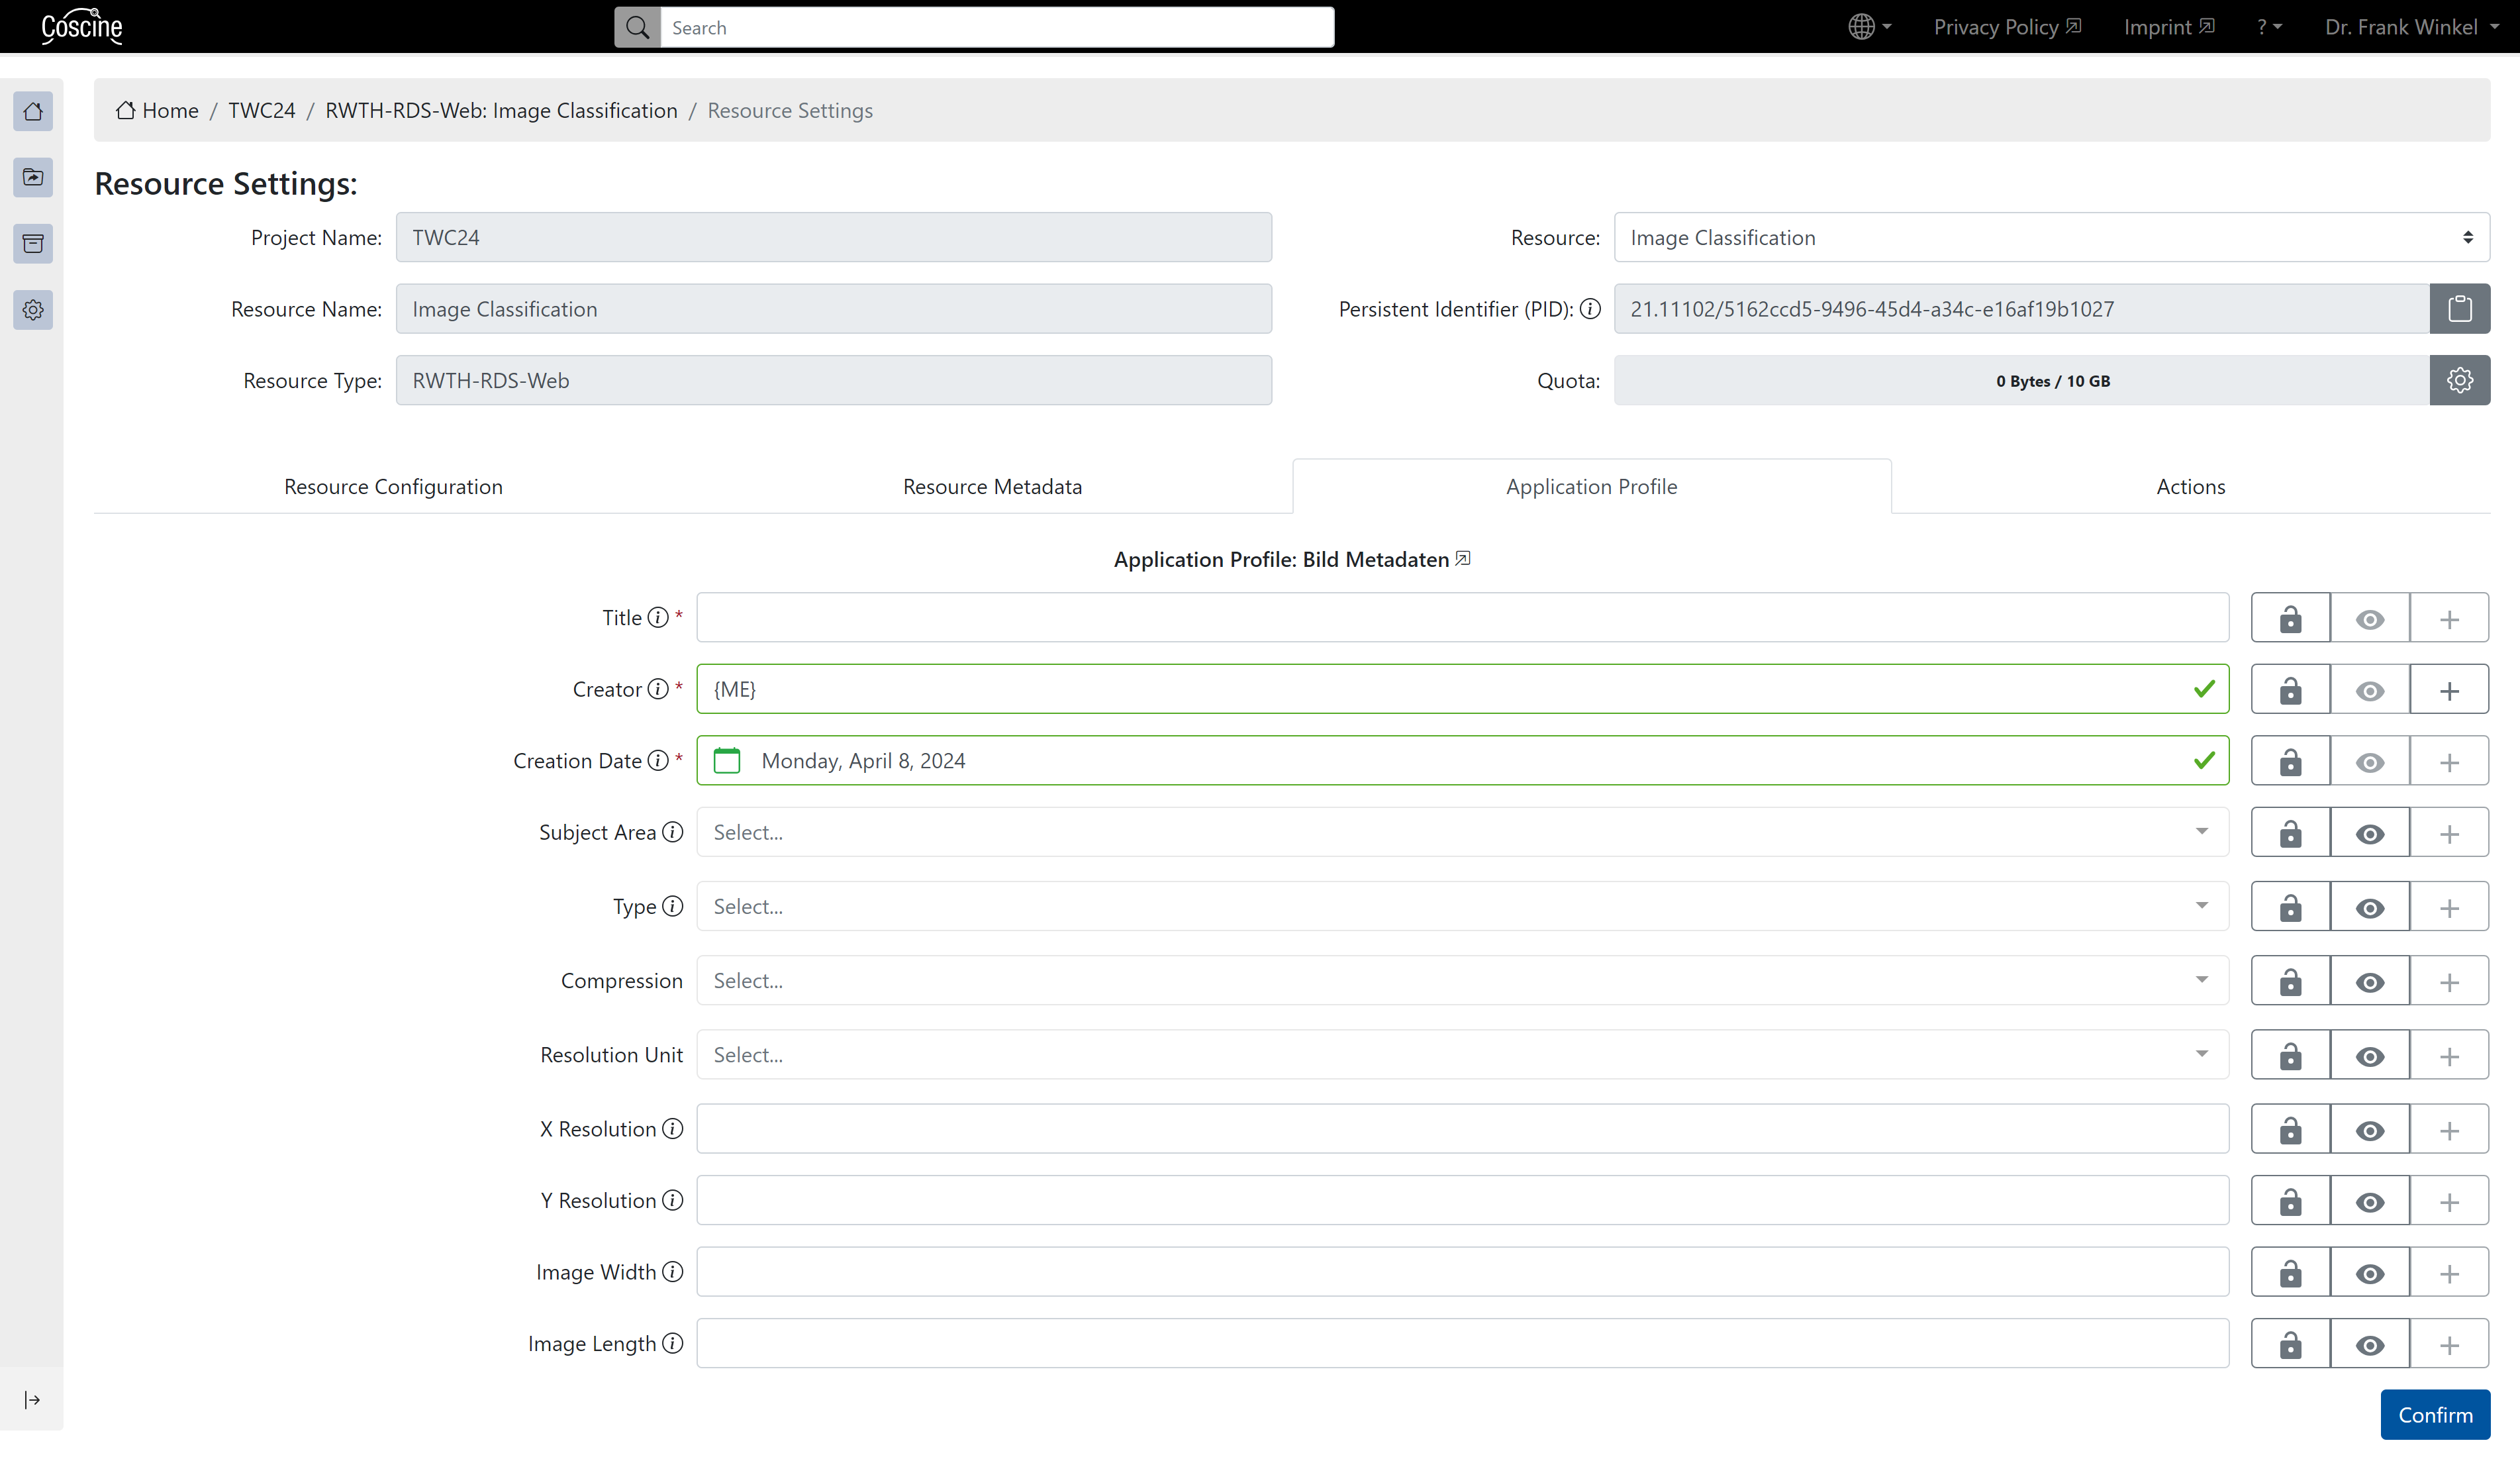
In this tab, you will find the metadata profile selected when creating the resource (see Figure 3). You cannot change the metadata profile, but you can customise it (for more information on these functions, see create a resource).
You can also download the metadata profile here for use outside Coscine (via the Download metadata profile button).
Actions
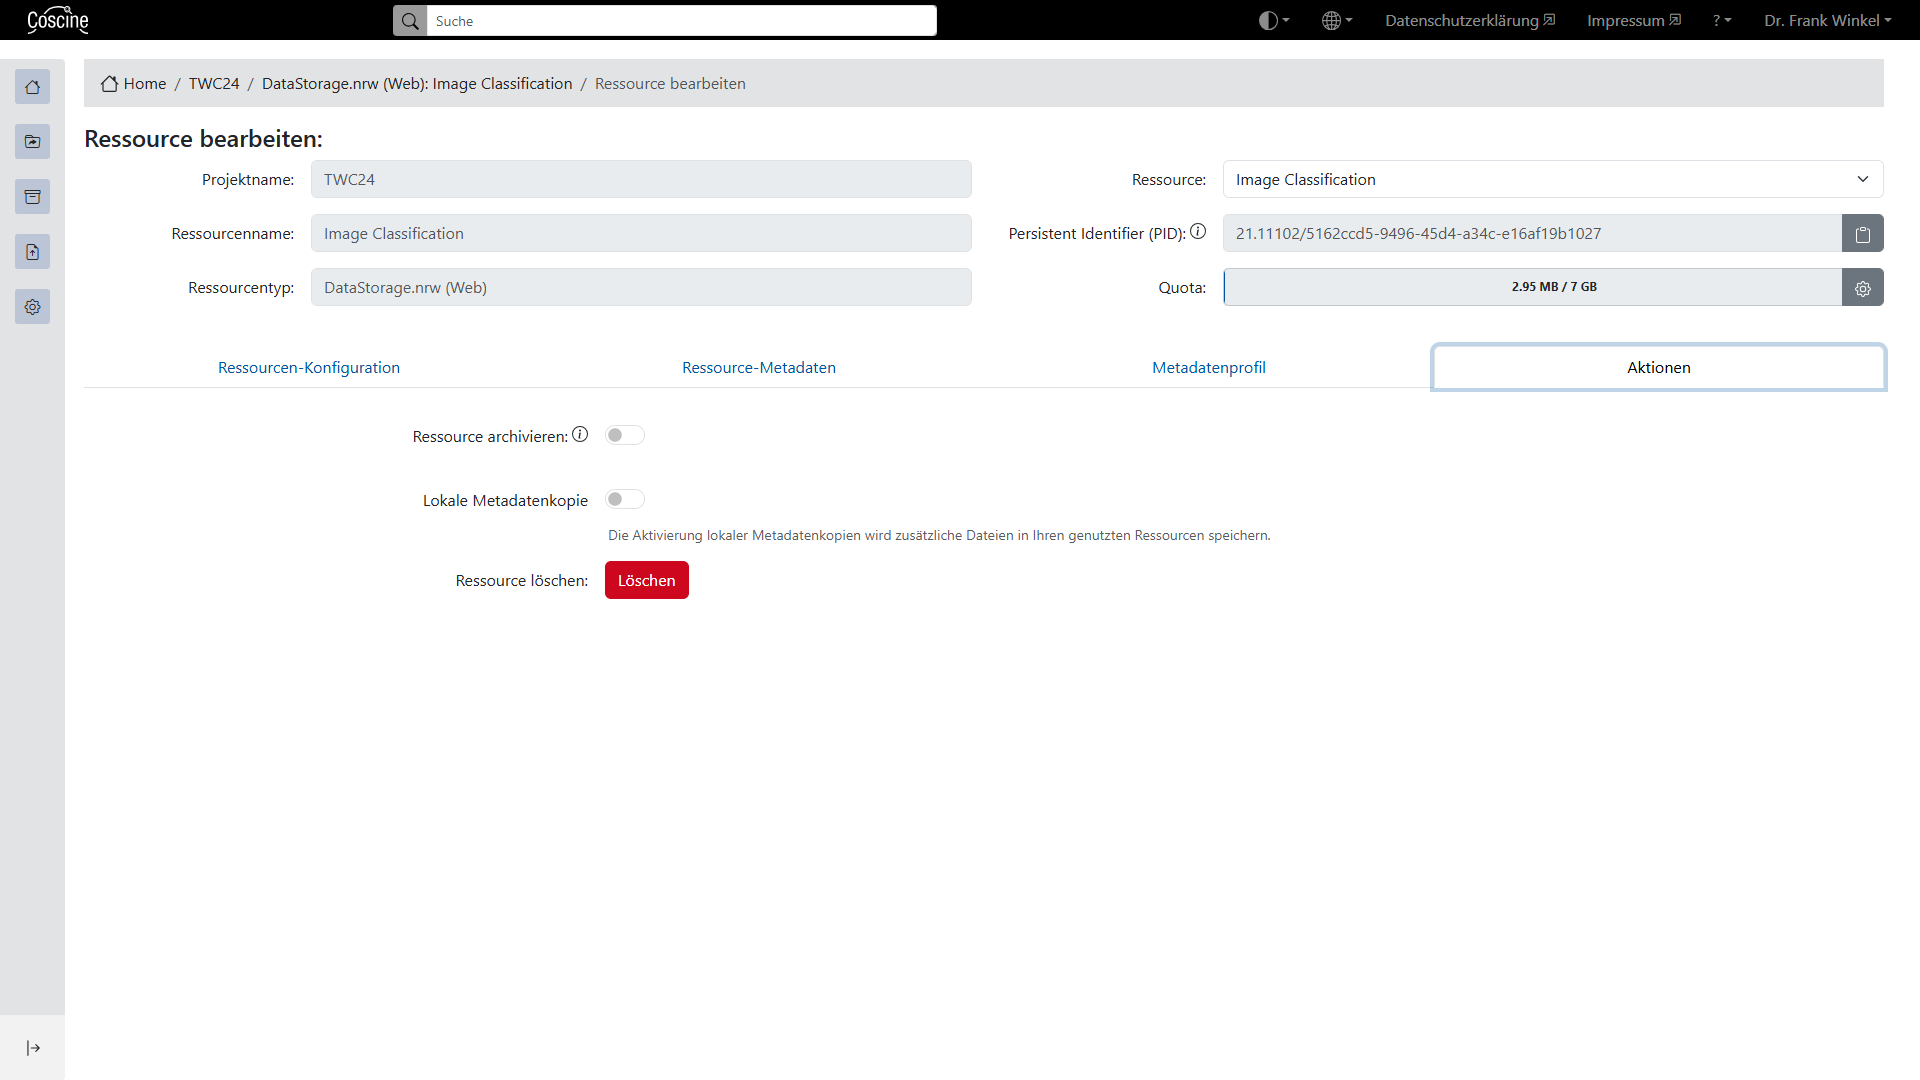
There are three actions available in this tab (see Figure 4):
Read-Only ModeLocal copy of metadataDelete resource
Hint: Read-Only Mode
Now data and metadata cannot be edited by users anymore. However they can still read and download data as usual. To add or edit data members with the role "Project Owner" (see Rights and Membership Management) can deactivate the "Read-Only" status and reinstate it afterwards.