Resource Creation
Here you will learn how to add resources in Coscine.
Open Resource Configuration
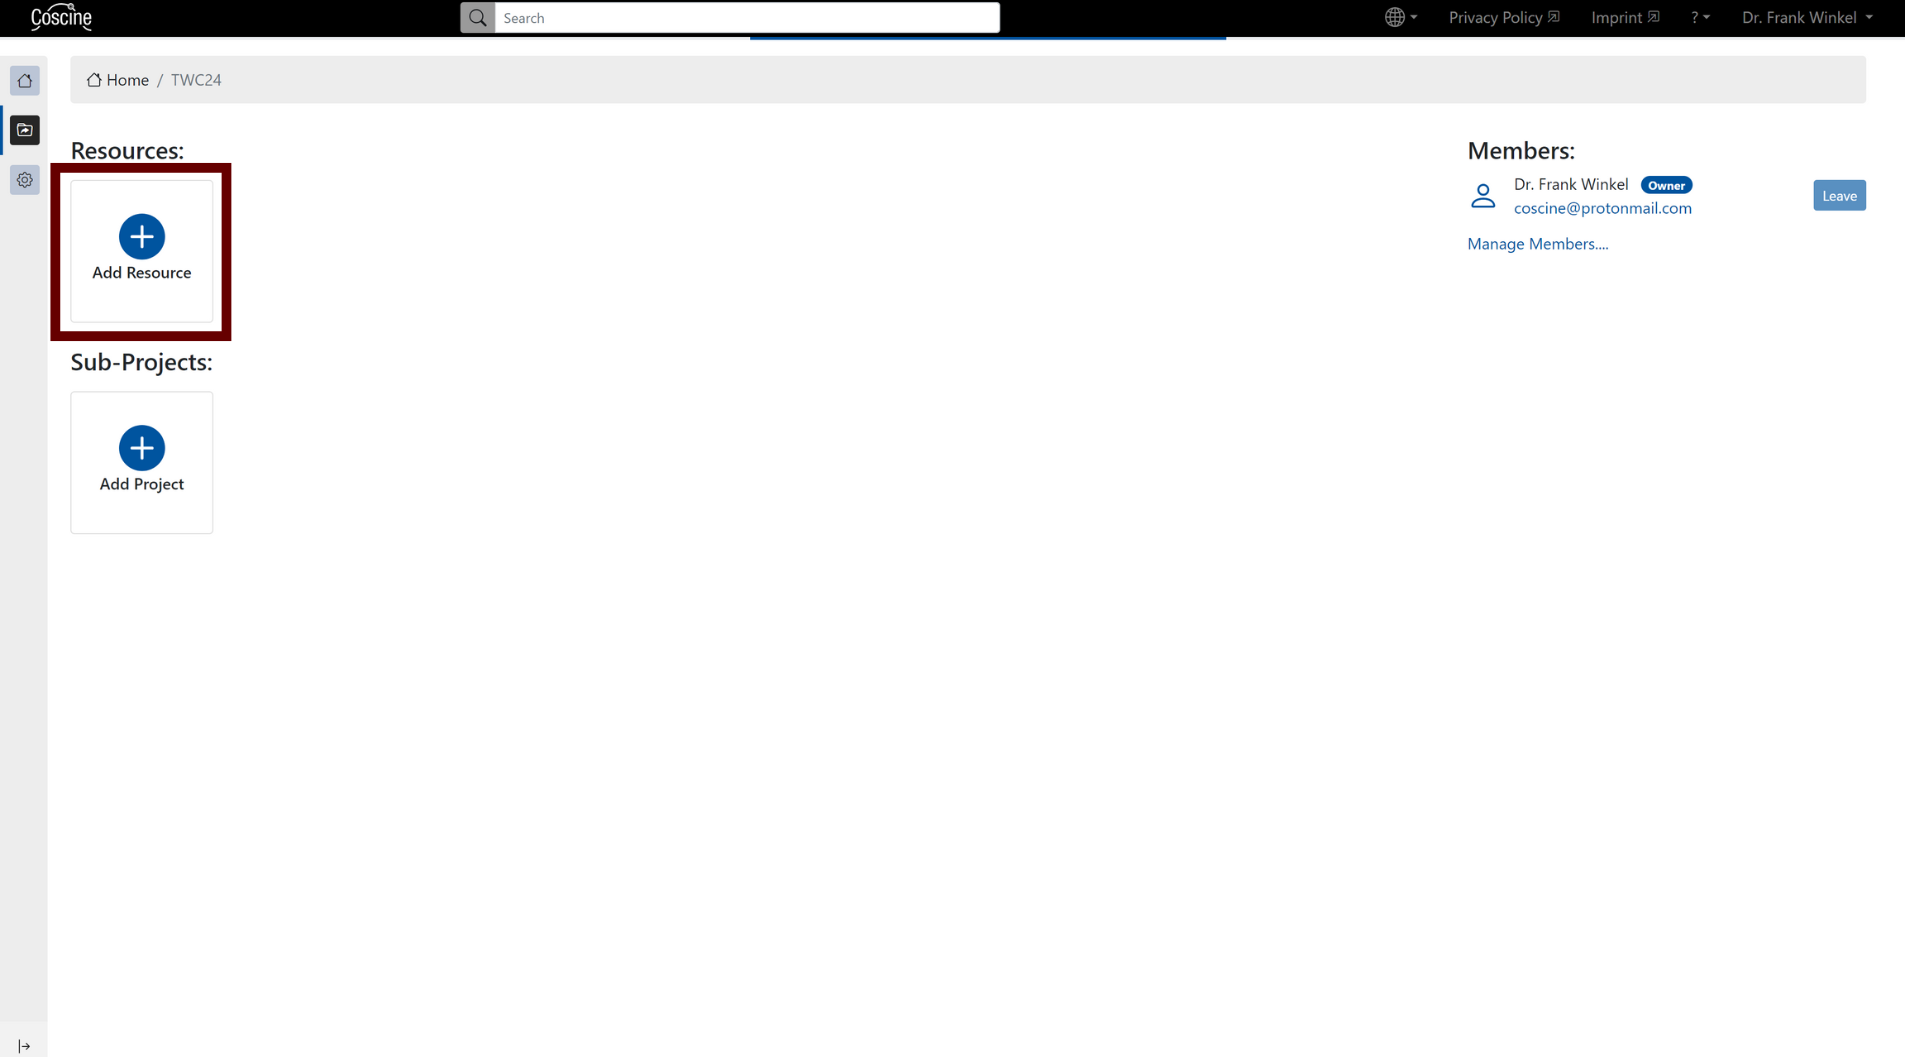
Select the Add Resource button on the home page of the project (see Figure 1). You will be redirected to the resource configuration, which includes 4 steps. Fields marked with an asterisk (*) are mandatory.
Hint
The resources created are automatically sorted and displayed alphabetically according to the resource name.
Step 1: Resource Configuration
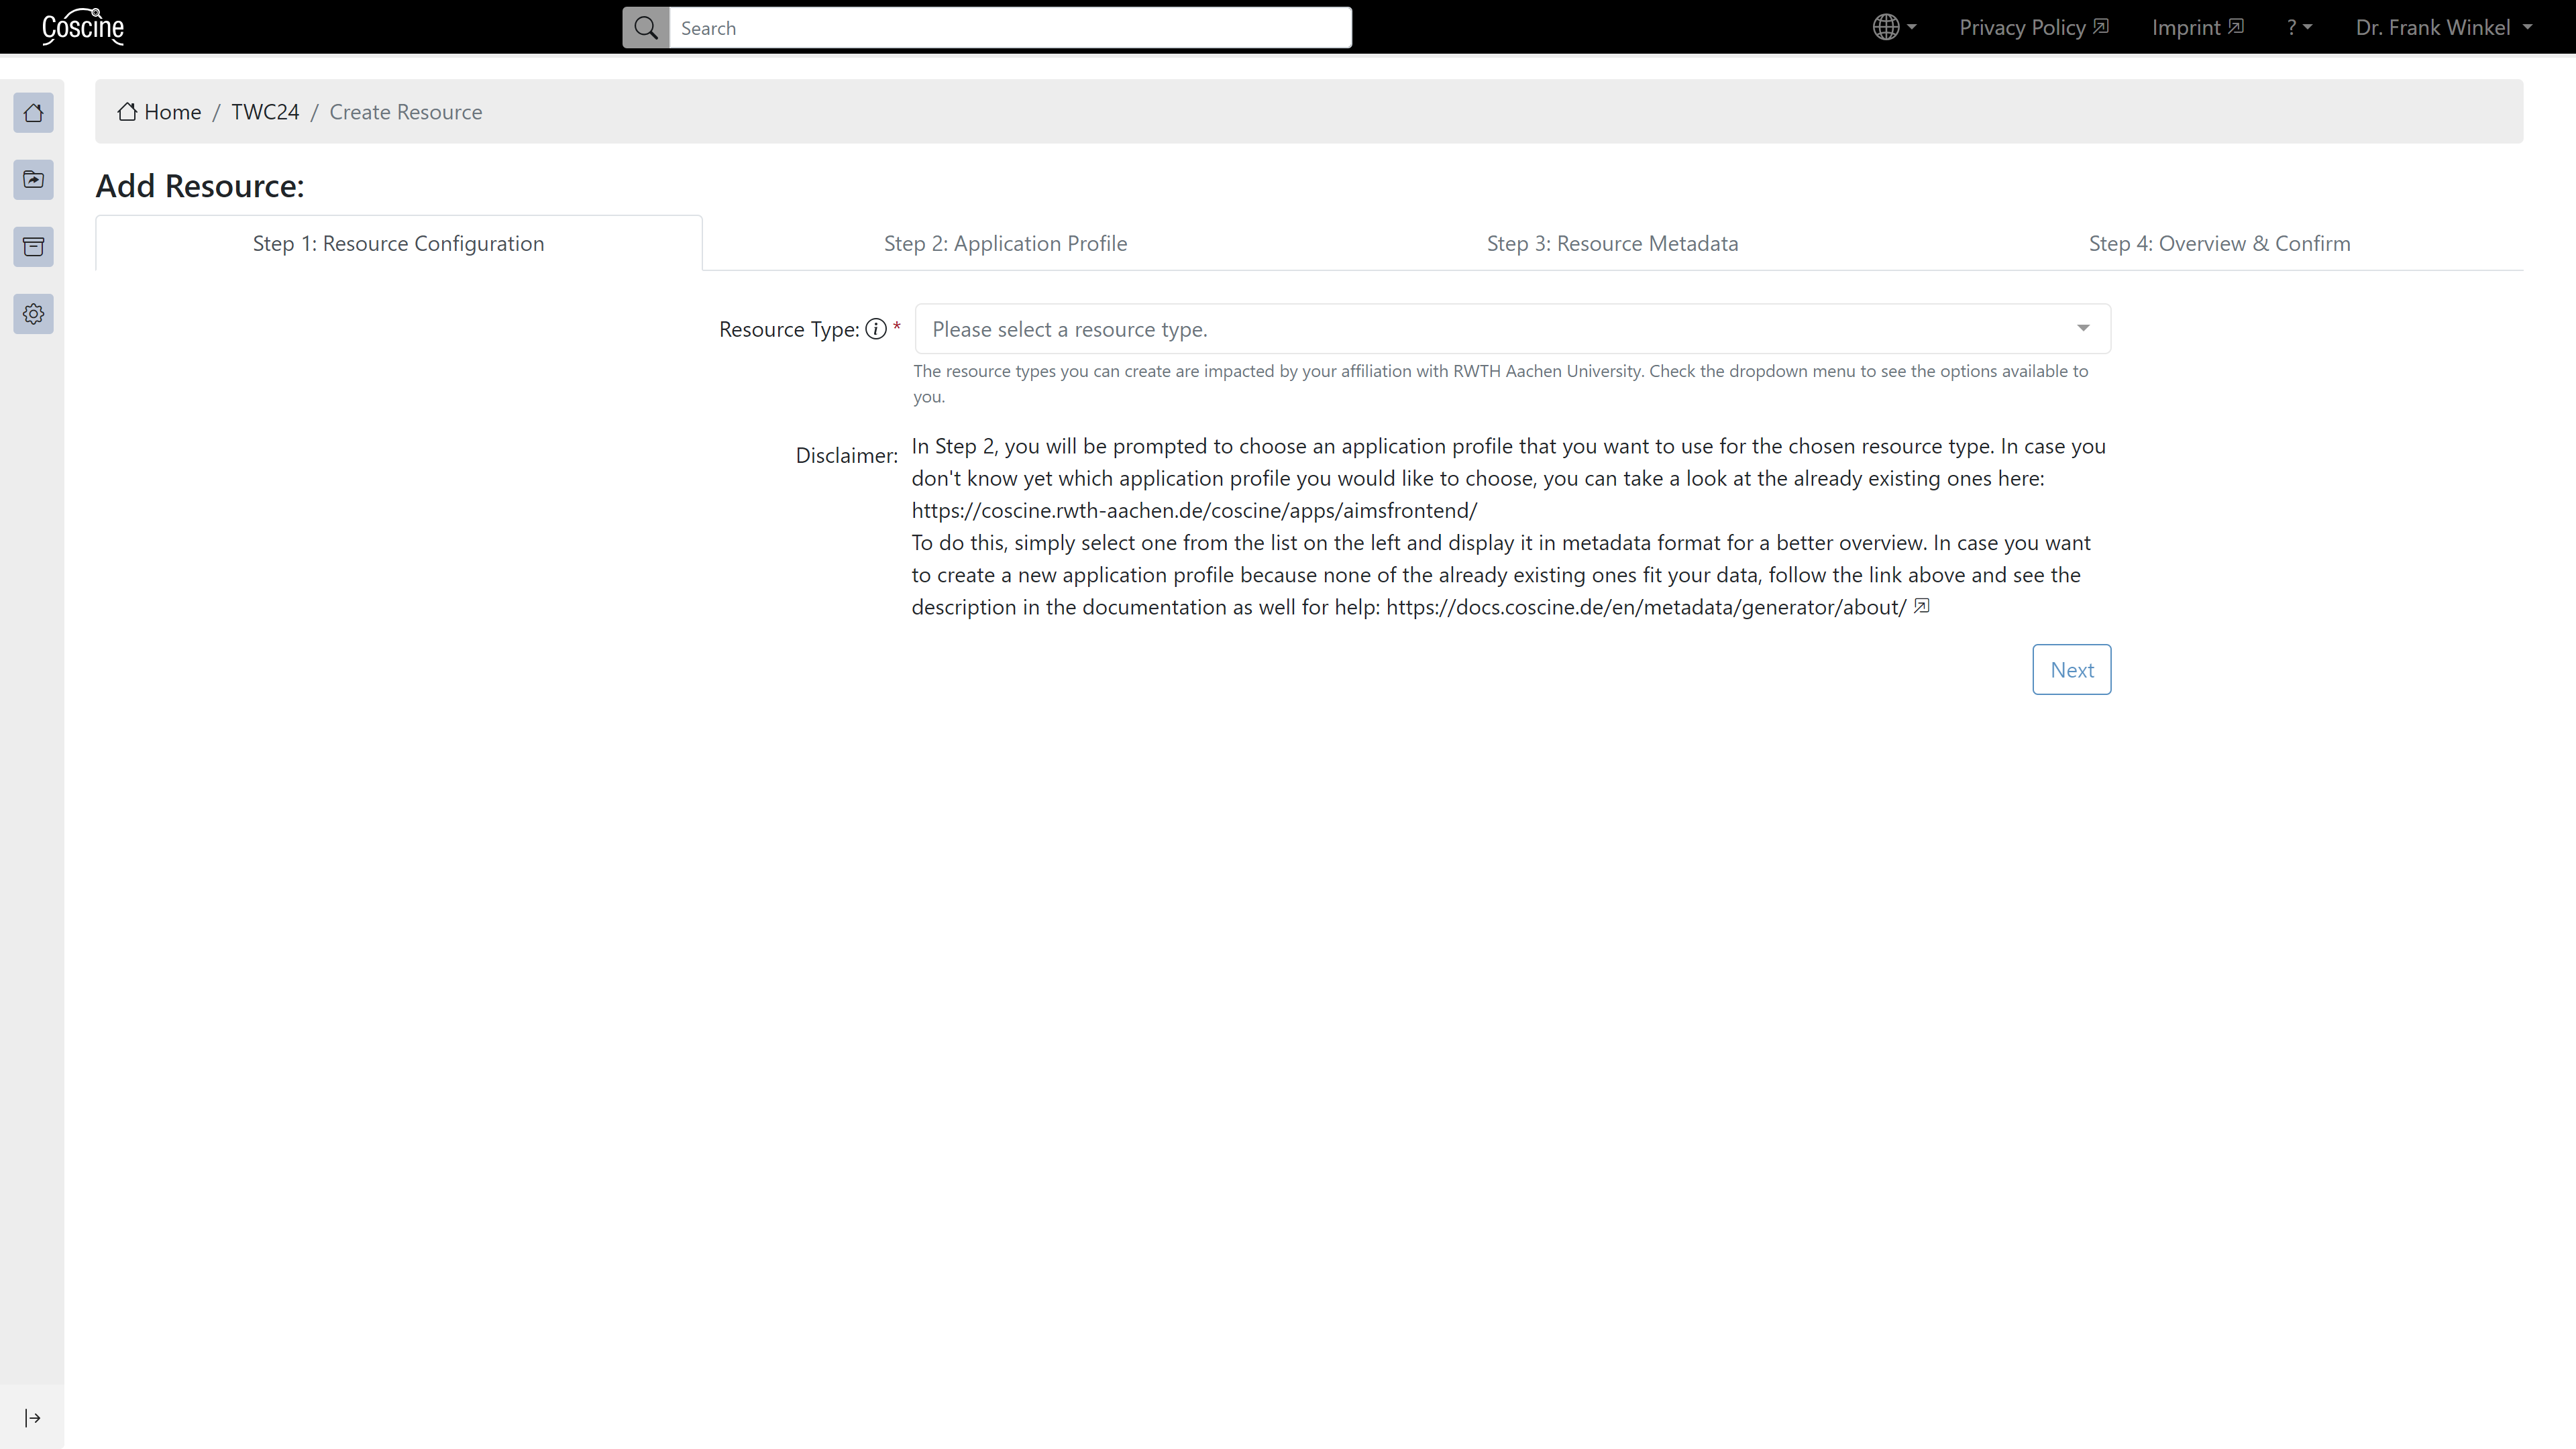
In the first step, you first select a resource type (see Figure 2). Depending on the selection of the resource type, a certain storage volume is available to you per project. Select the storage by entering a value (see Figure 2). If you do not have any storage available, you must first request storage volume for your project and the respective resource type (see Storage Management).
Confirm your selection by pressing the Next button.
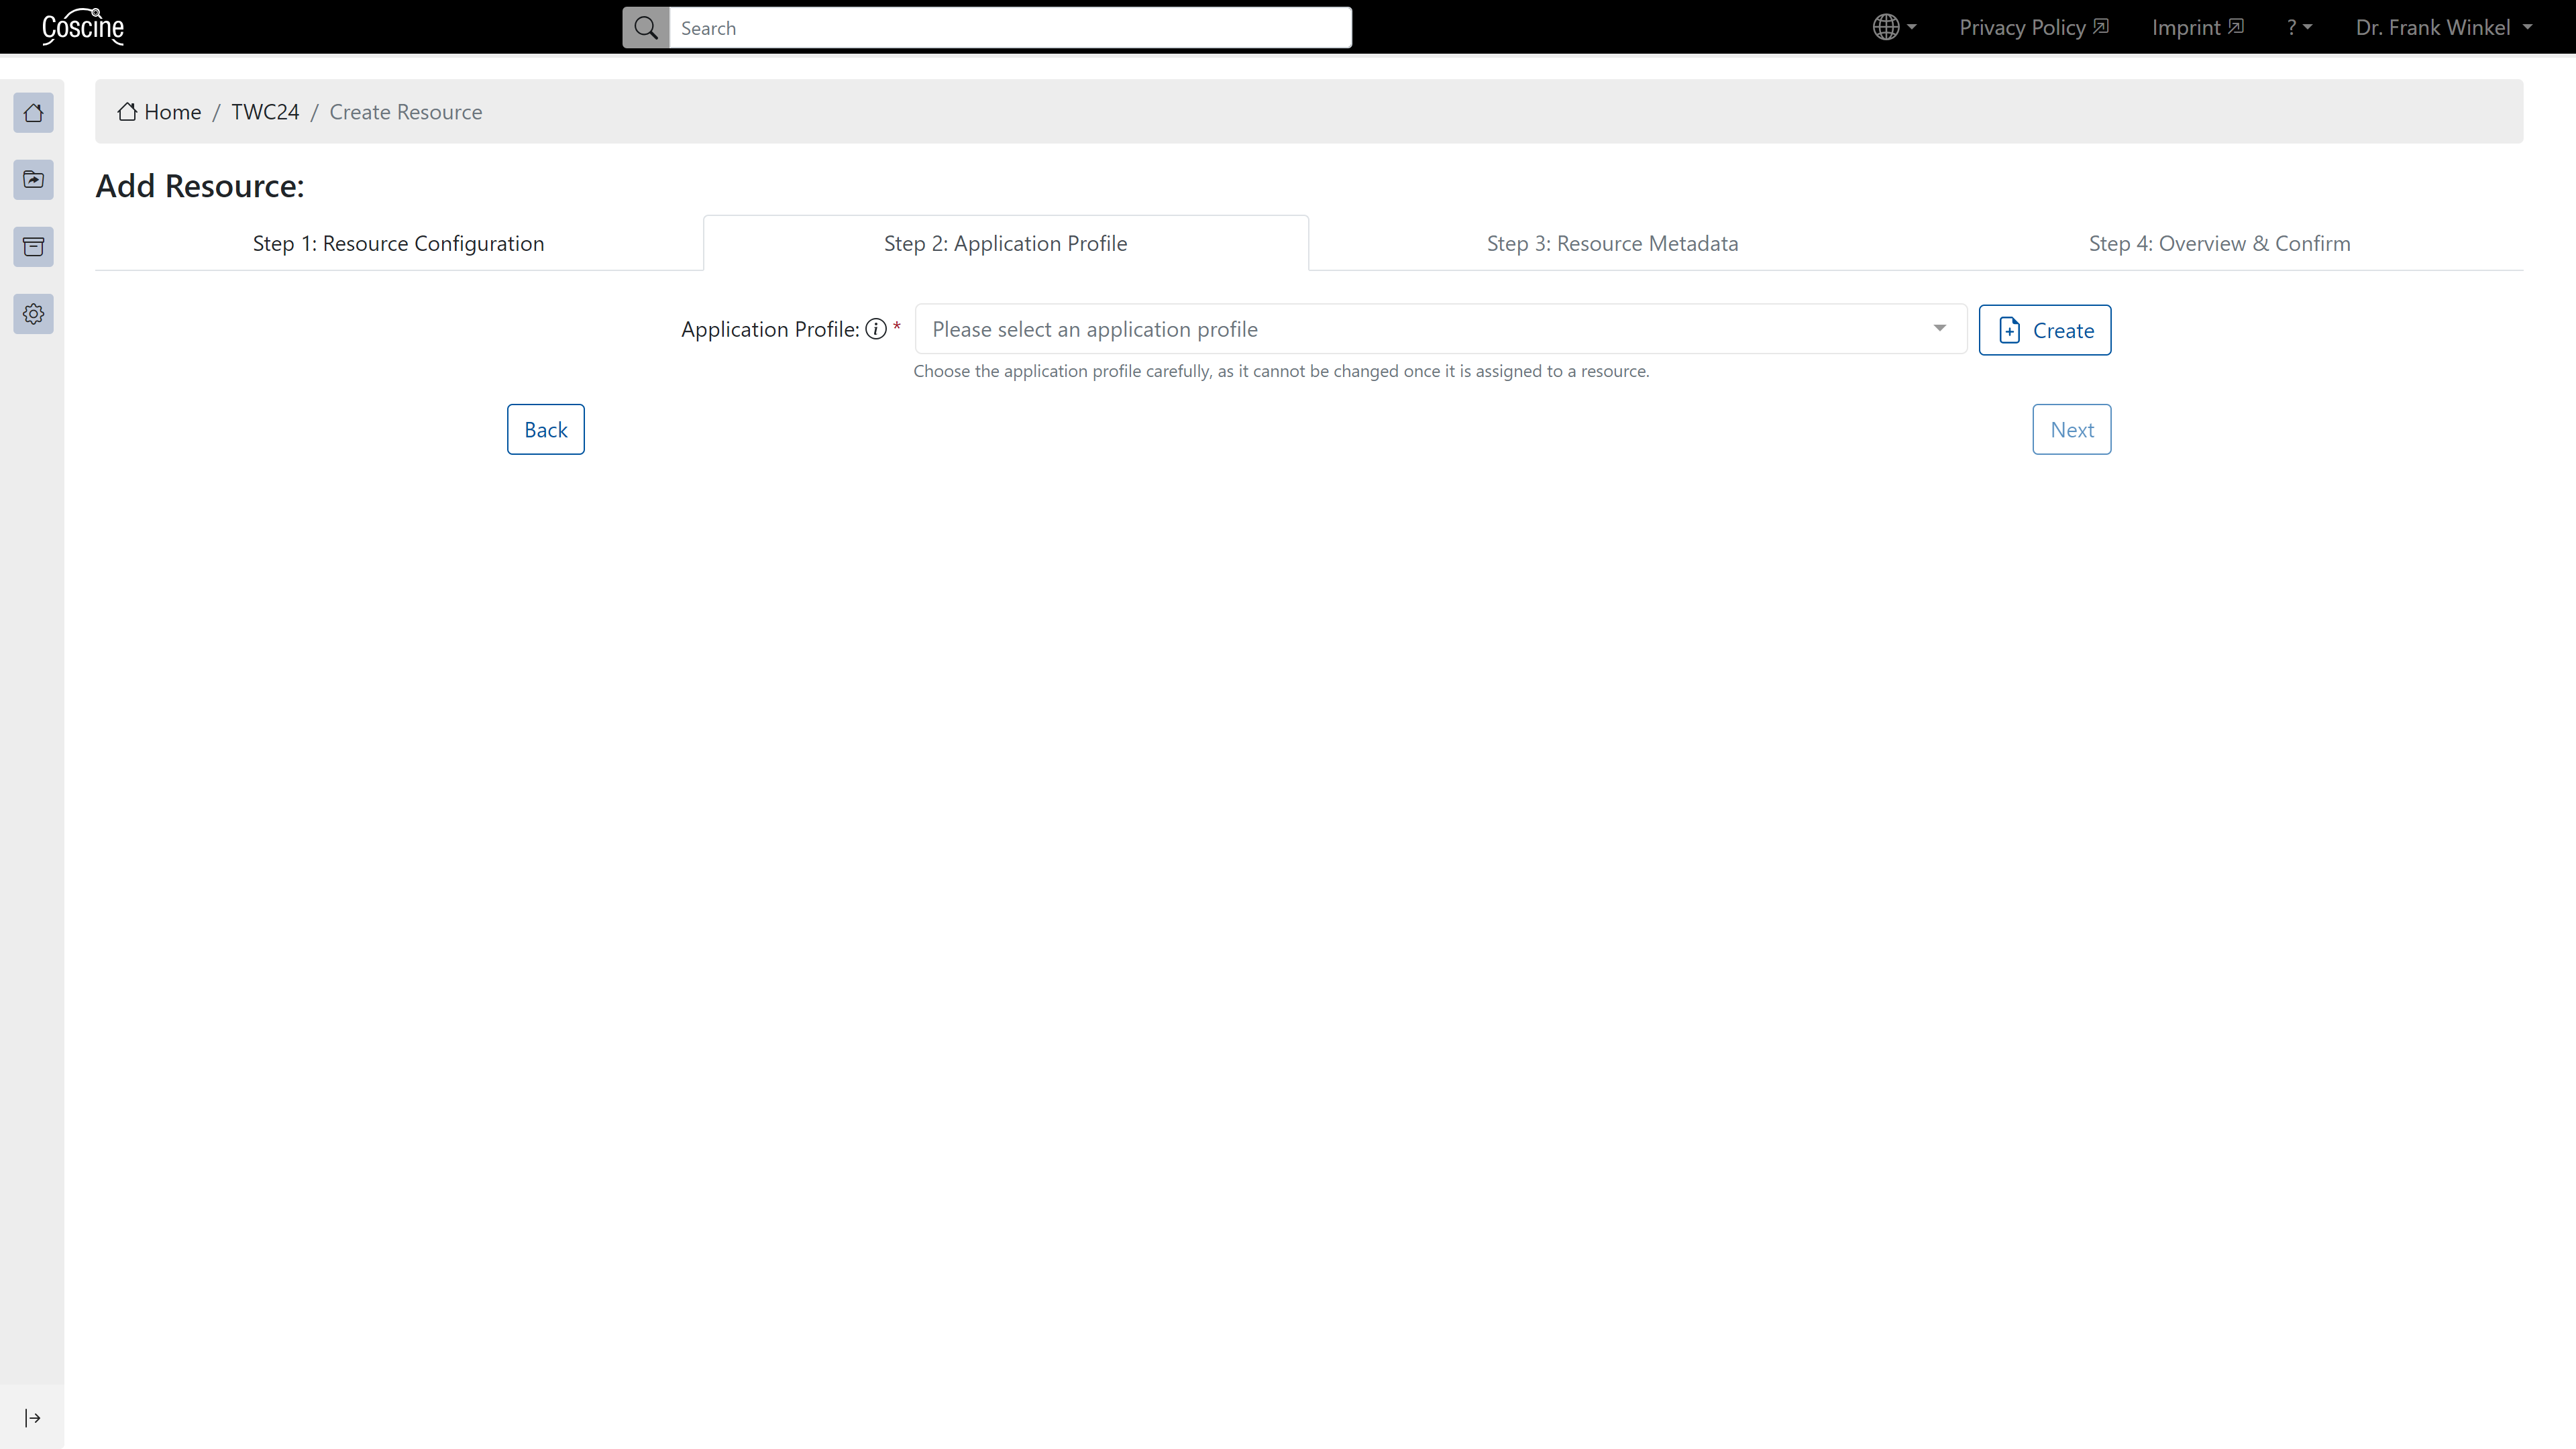
Step 2: Metadata Profile
This will take you to the selection of the metadata profile for your data. An metadata profile contains the metadata with which you describe your research data and is crucial for the comprehensibility of your data (e.g. for cooperation partners and yourself in 10 years).
Select an already established metadata profile (recommended)
Use the drop-down menu to see the currently available metadata profiles. Generally valid metadata profiles are e.g. RADAR (generic) and Engmeta (for engineering). For some research groups we have already developed individual metadata profiles. You can find more information under Metadata and Metadata Profiles.
Create an individual metadata profile
If there is no suitable metadata profile, you can select Create to access the Metadata Profile Generator and create an individual metadata profile. However, approval of the individual metadata profile can take up to three weeks.
To continue, select a metadata profile. After selecting a metadata profile, the associated fields become visible (see Figure 4). You can now use the icons next to the fields to customize the metadata profile (see below). Note: In this step, you do not have to fill in all fields with asterisks, as you did in step 2. These fields will only become mandatory fields when you upload your data later.
Hint
In this step, you do not have to fill in all fields with asterisks, as you did in step 2. These fields will only become mandatory fields when you upload your data later.
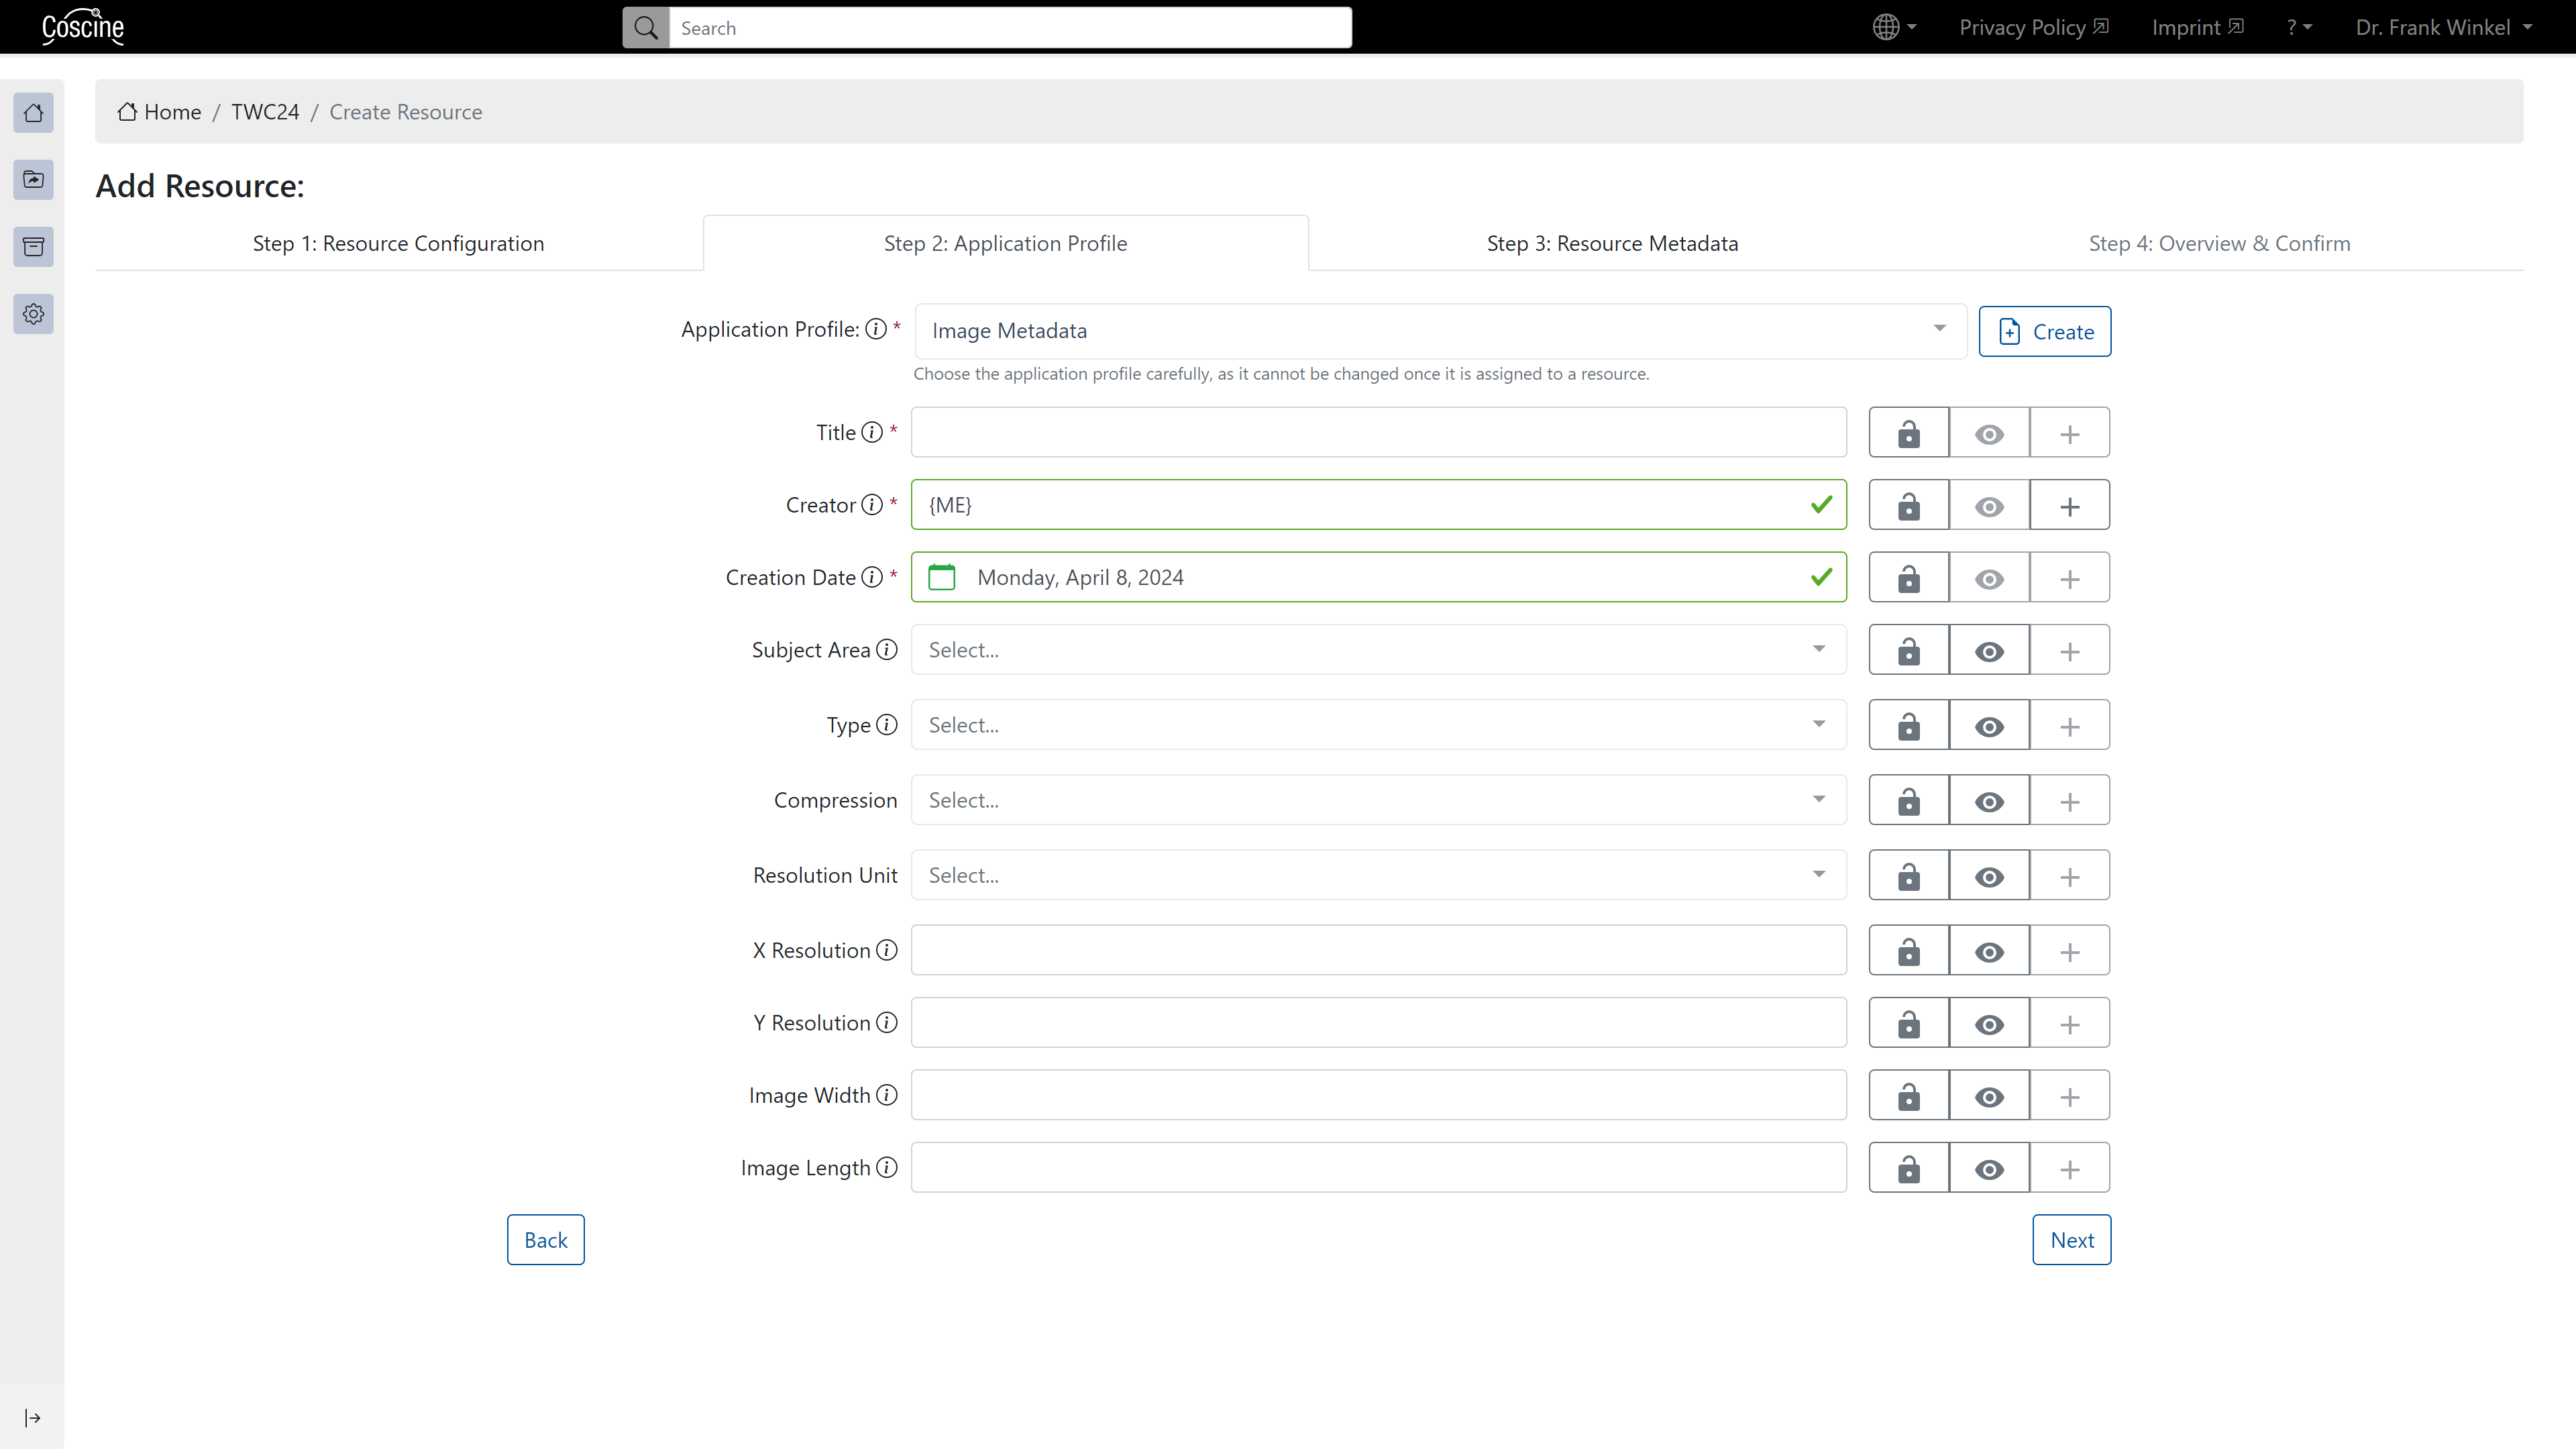

f you want to set values as unchangeable default value, first enter the default value in the field and then click on the lock. All data that is uploaded will automatically receive this unchangeable metadata value (e.g. a fixed contact person or PI).

If some fields do not match your own data, optional fields can be hidden by clicking on the eye. Mandatory fields can only be hidden if a default value has been specified.

If you need a field more than once, e.g. Author, you can add this field again using the plus.
| Visibility of a resource’s metadata | Project | Resource | Can the resource’s metadata be found? | Description |
|---|---|---|---|---|
| Public | Project Members | Public | Yes | The resource’s metadata can be searched publicly, even if the project is only visible to project members. |
| Public | Public | Yes | The metadata for the project and the resource can be searched publicly. | |
| Project Members | Public | Project Members | No | The resource’s metadata is private and visible only to project members, even if the project’s metadata is publicly searchable. |
| Project Members | Project Members | No | The resource’s metadata is visible only to project members. |
Step 3: Metadata
In the third step, you will be asked to provide general information about the resource. Table 1 gives you an overview of the fields asked for. In the following Figure 5 you can see an example of how to fill in the fields.
| Property | Description |
|---|---|
| Resource Name* | Give the resource a unique name. Maximum 200 characters. |
| Display Name* | A short display name of up to 25 characters. |
| Resource Description* | Describe the content and purpose of the resource. Maximum 10.000 characters. |
| Discipline* | Select one or more scientific disciplines that can be assigned to the resource. By default the disciplines of the project are used, but these can be changed. |
| Resource Keywords | Set keywords for the resource so that it can be easily searched for later. |
| Metadata Visibility* | The public setting means that metadata published via Coscine can be found not only via the internal Coscine search but also via a public knowledge graph. The visibility of metadata for projects and resources is independent of one another. The files are only visible to other users, not accessible. This allows interested users to contact you. |
| License | You can select a license for the data in the resource. For research data, we recommend the Creative Commons licenses (CC licenses). For more information, visit forschungsdaten.info. |
| Internal Rules for Reuse | Specify special usage rights with regard to the resource. For example "only my institution". If the PI of the data is gone, it can help to inherit the data further. Maximum 200 characters. |
Table 1: Input fields of the resource configuration (Step 3).Fields marked with a red asterisk (*) are mandatory fields.

Default Variables
Coscine offers the option of assigning default variables to certain fields of the metadata profile. Via the {ME} variable for example, one can automatically assign the name of a user in Coscine to the field.
In addition, the default variable {TODAY} can be used to automatically specify the current date in a field. This can be very advantageous and time-saving.
In the future there will probably be more default variables available.
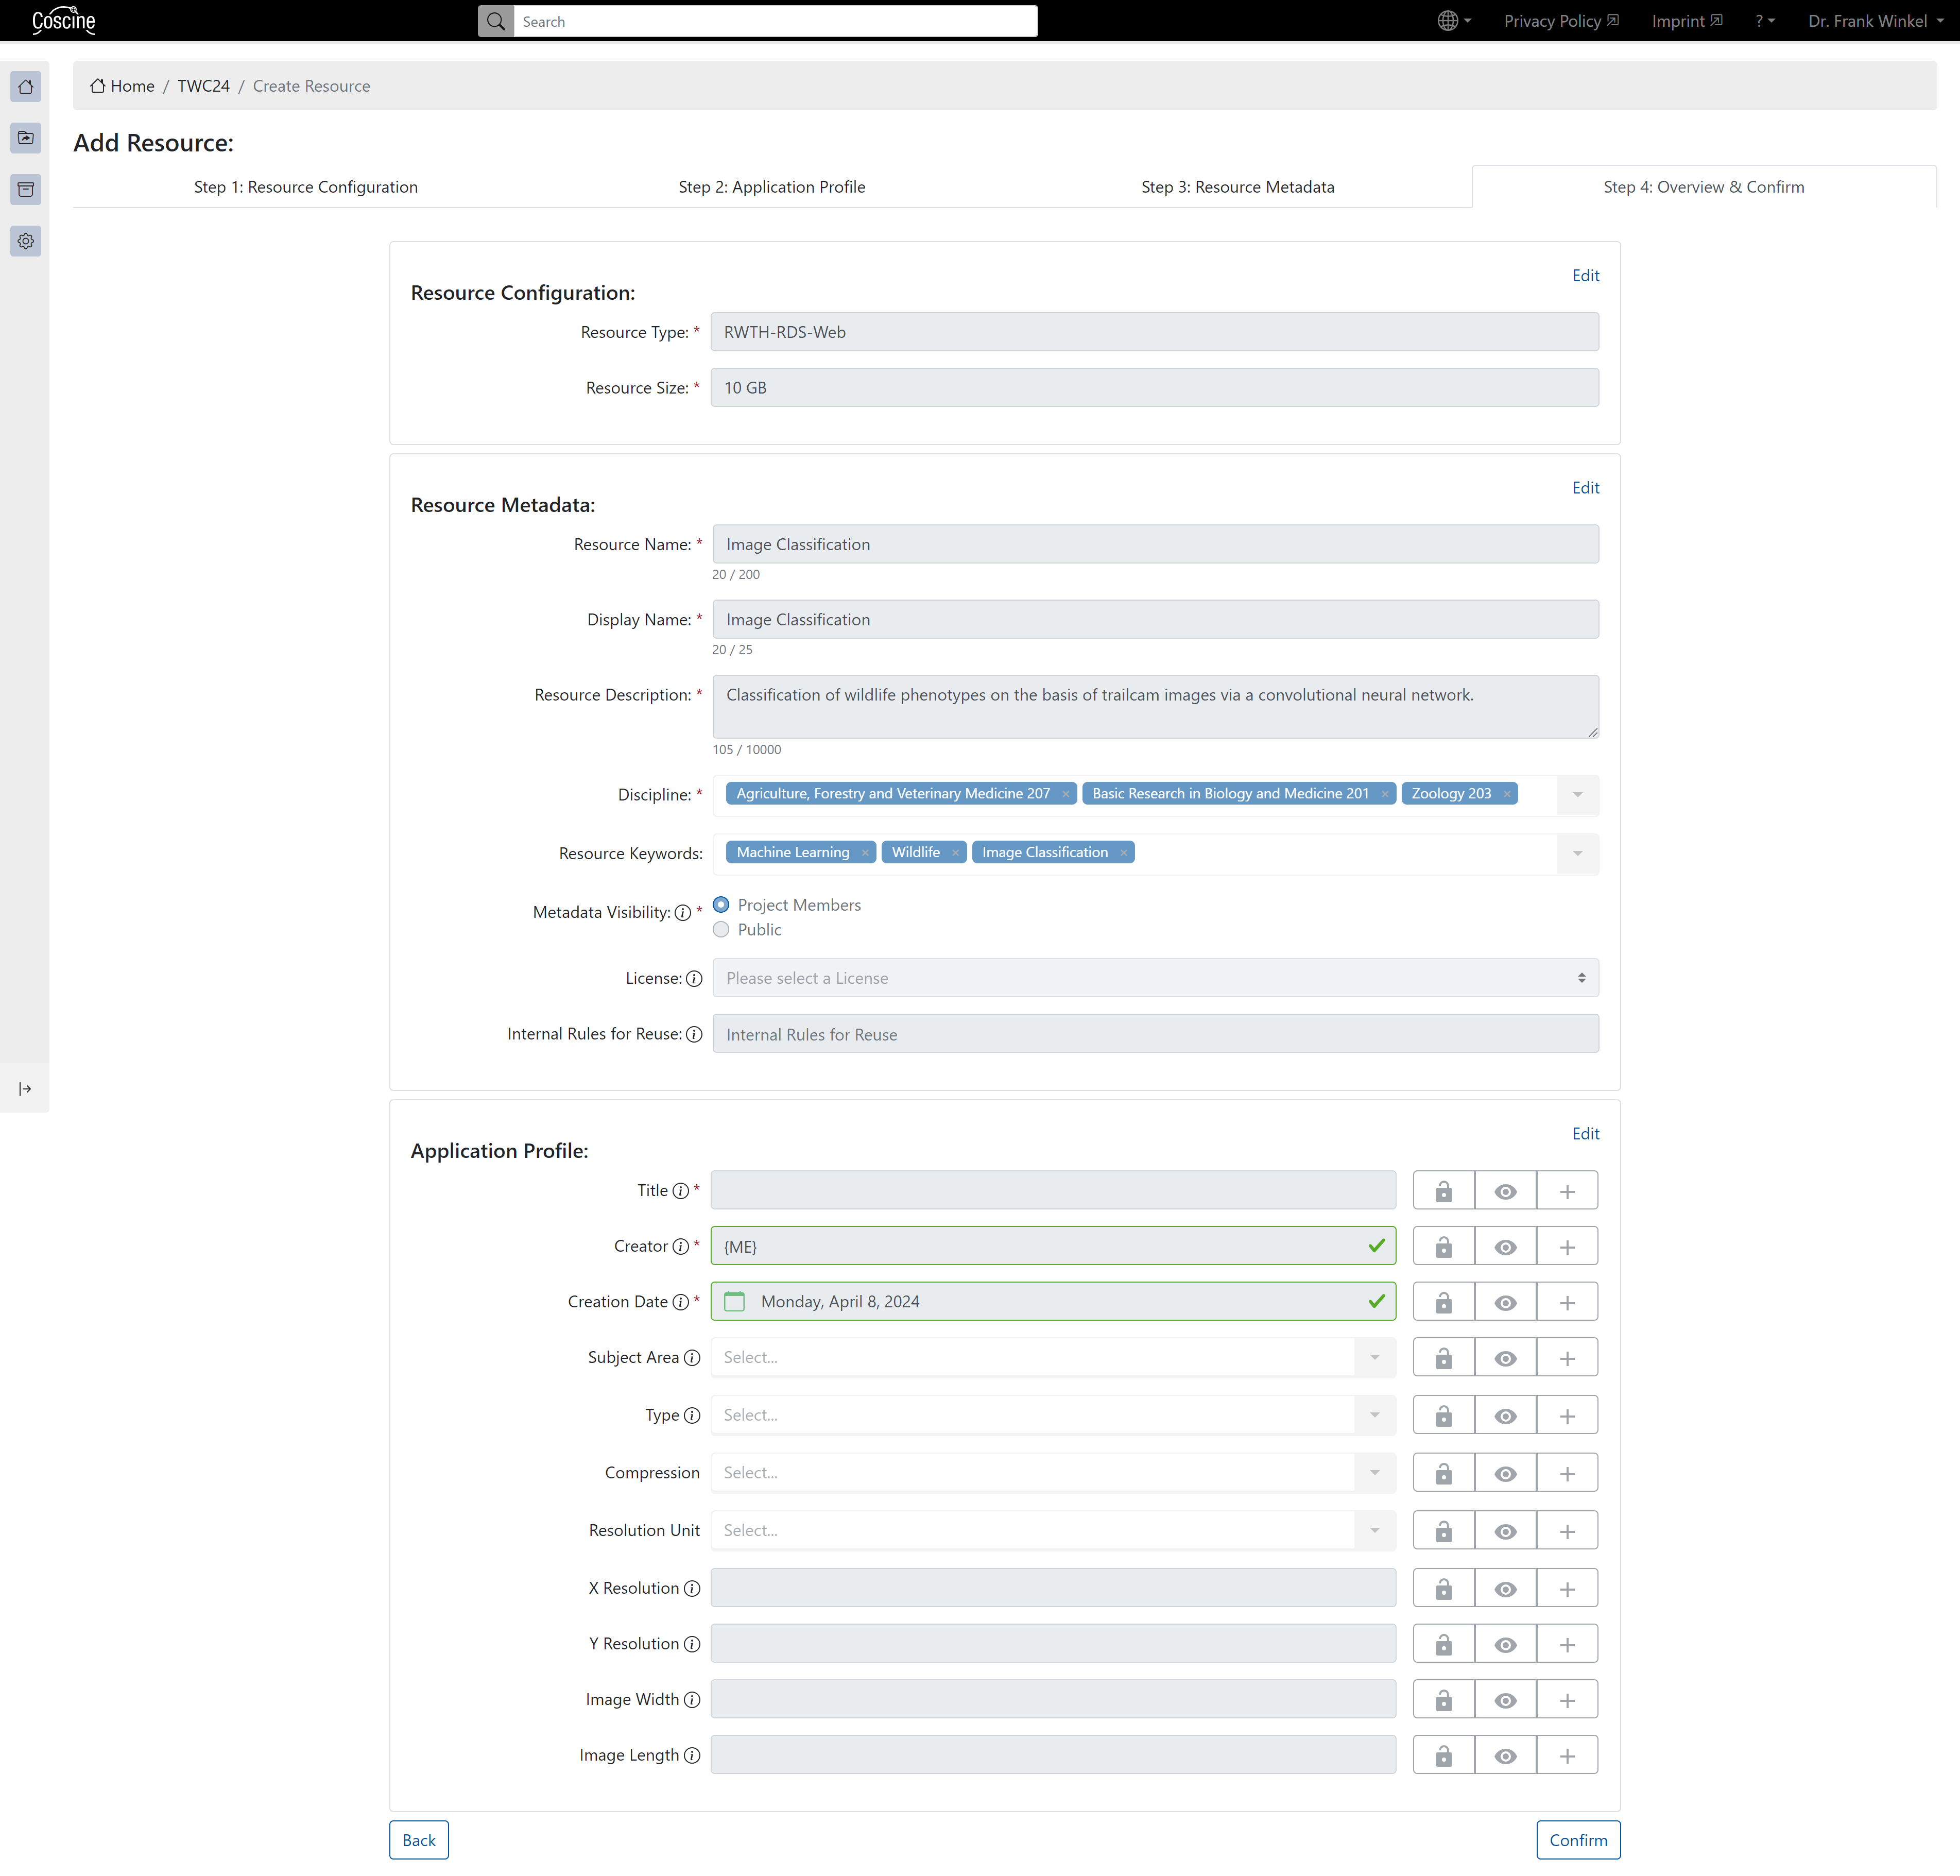
Step 4: Overview & Confirmation
Check and confirm your entries (see Figure 5, click on the figure to enlarge). If you click on a field in the overview, you will automatically return to the corresponding input page.